SUNSET / SOVA
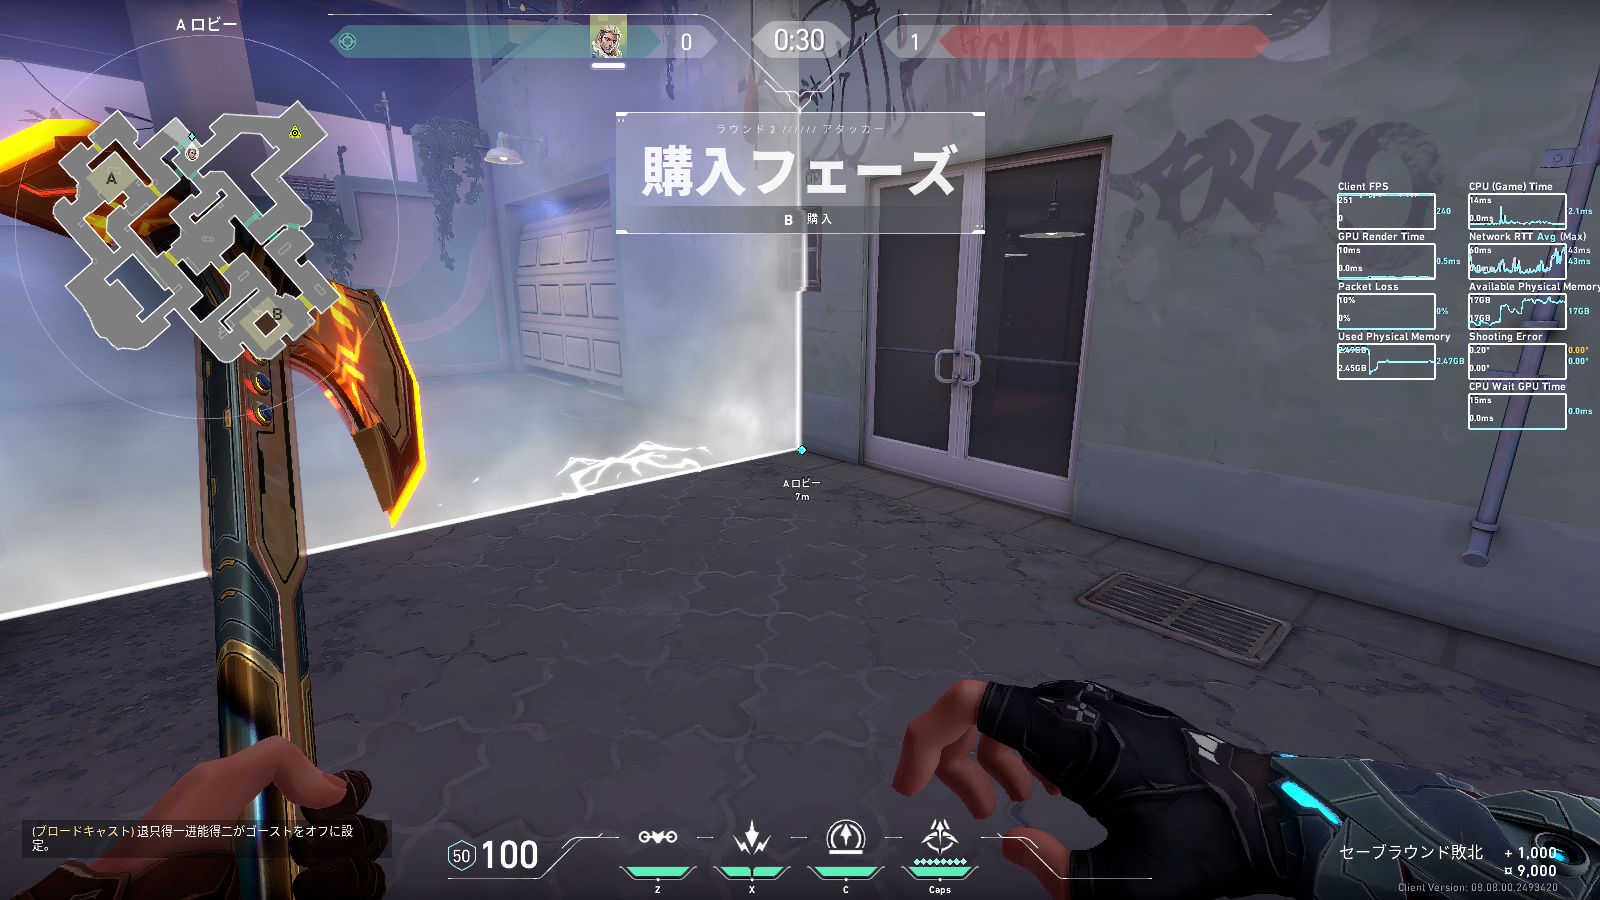
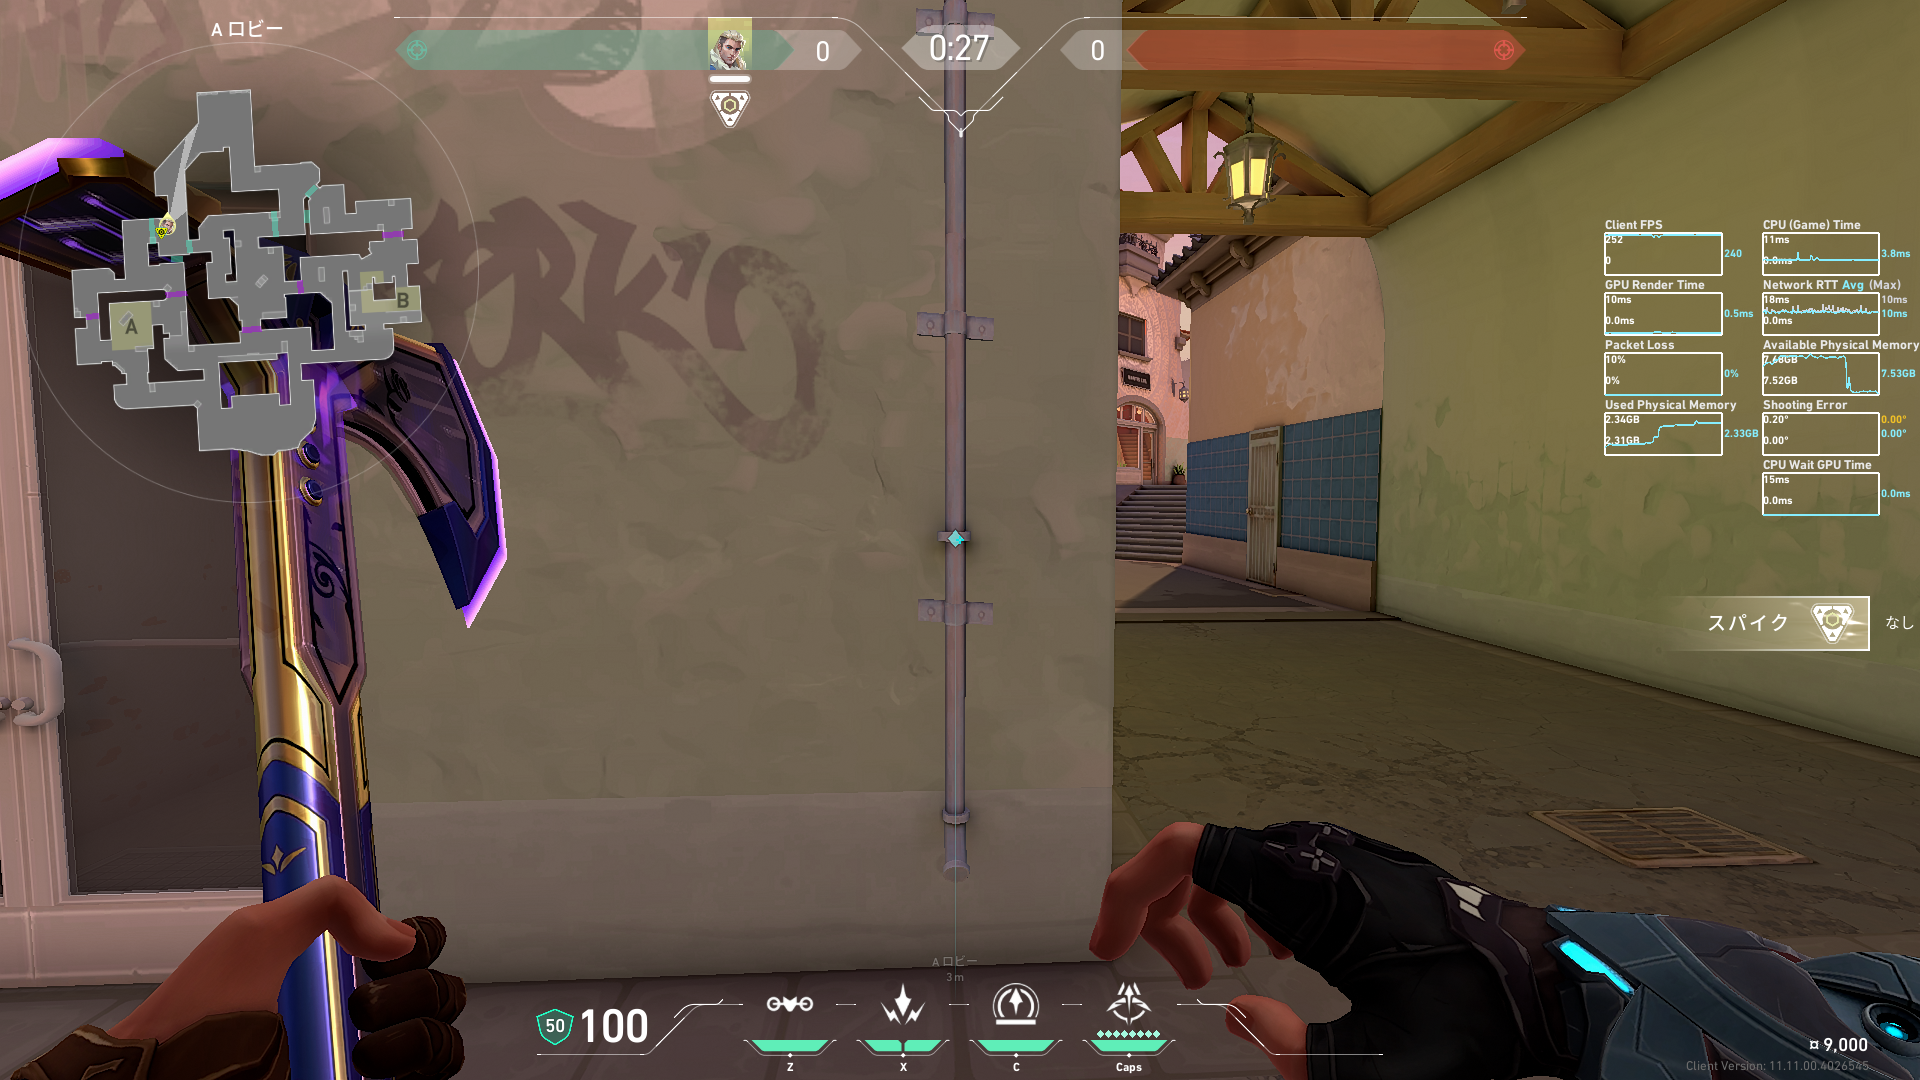
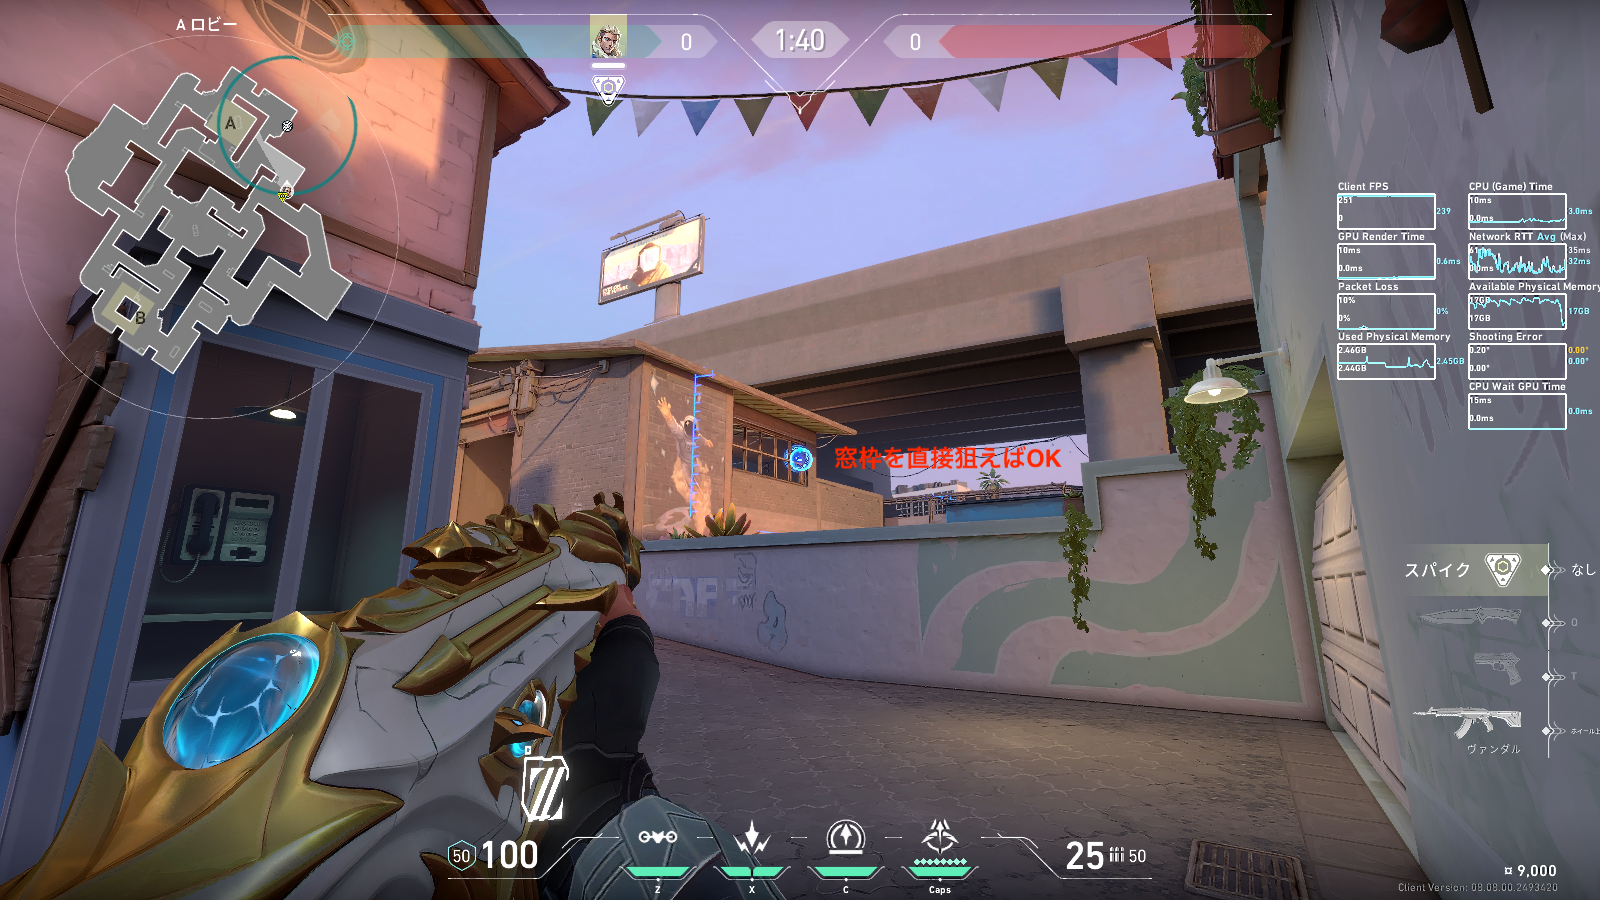 Preview | A攻めのときのエルボーリコン① |
 Preview 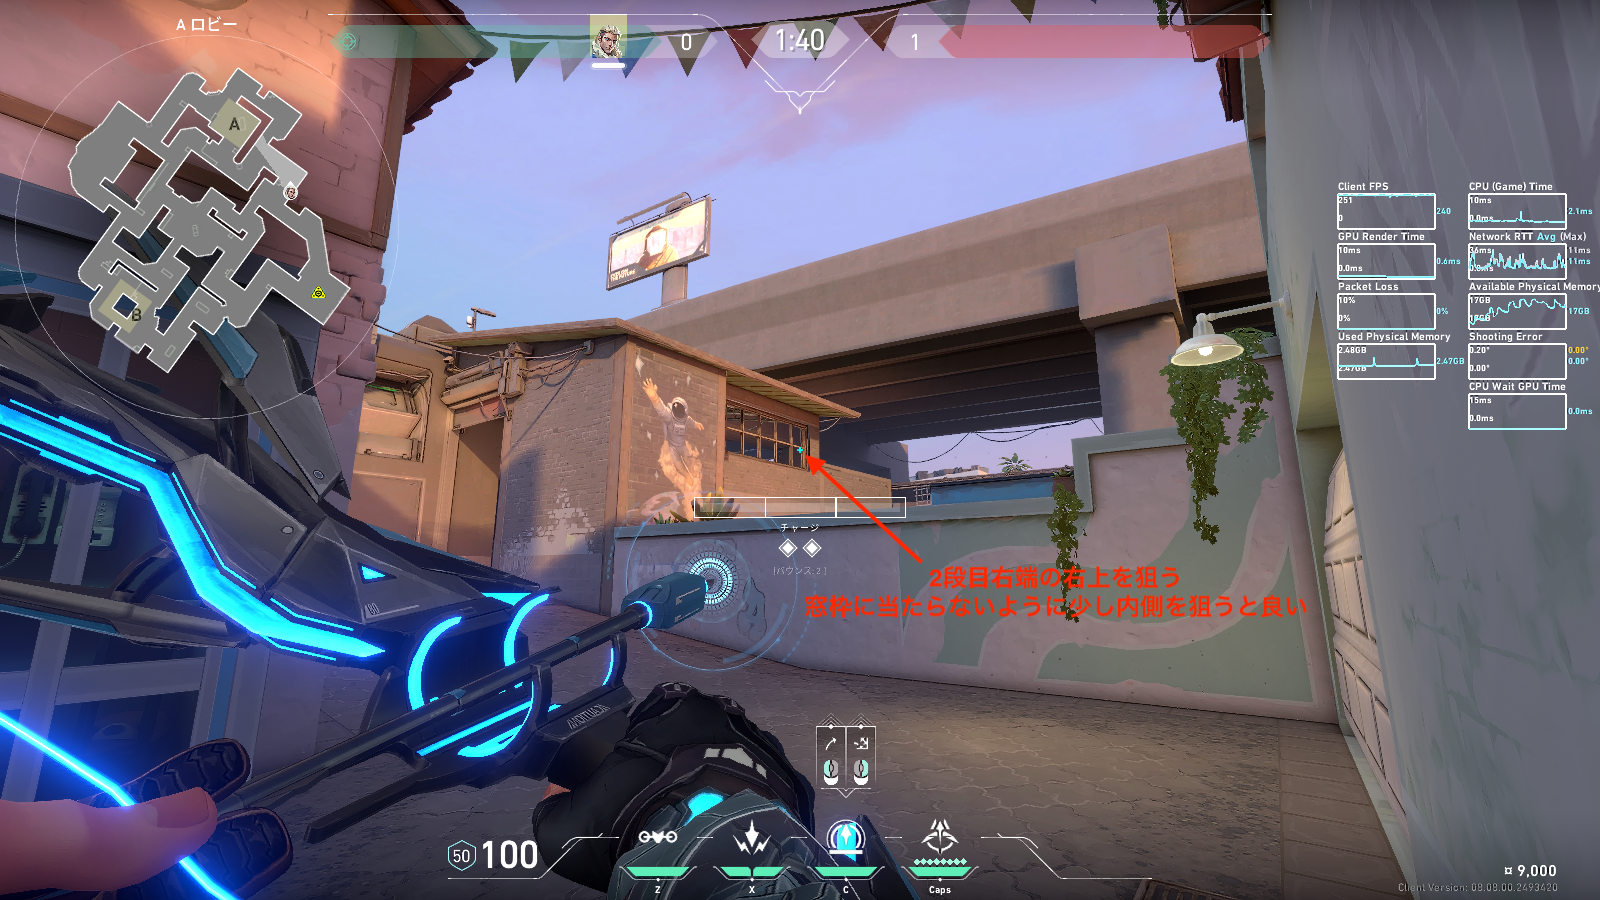 Preview 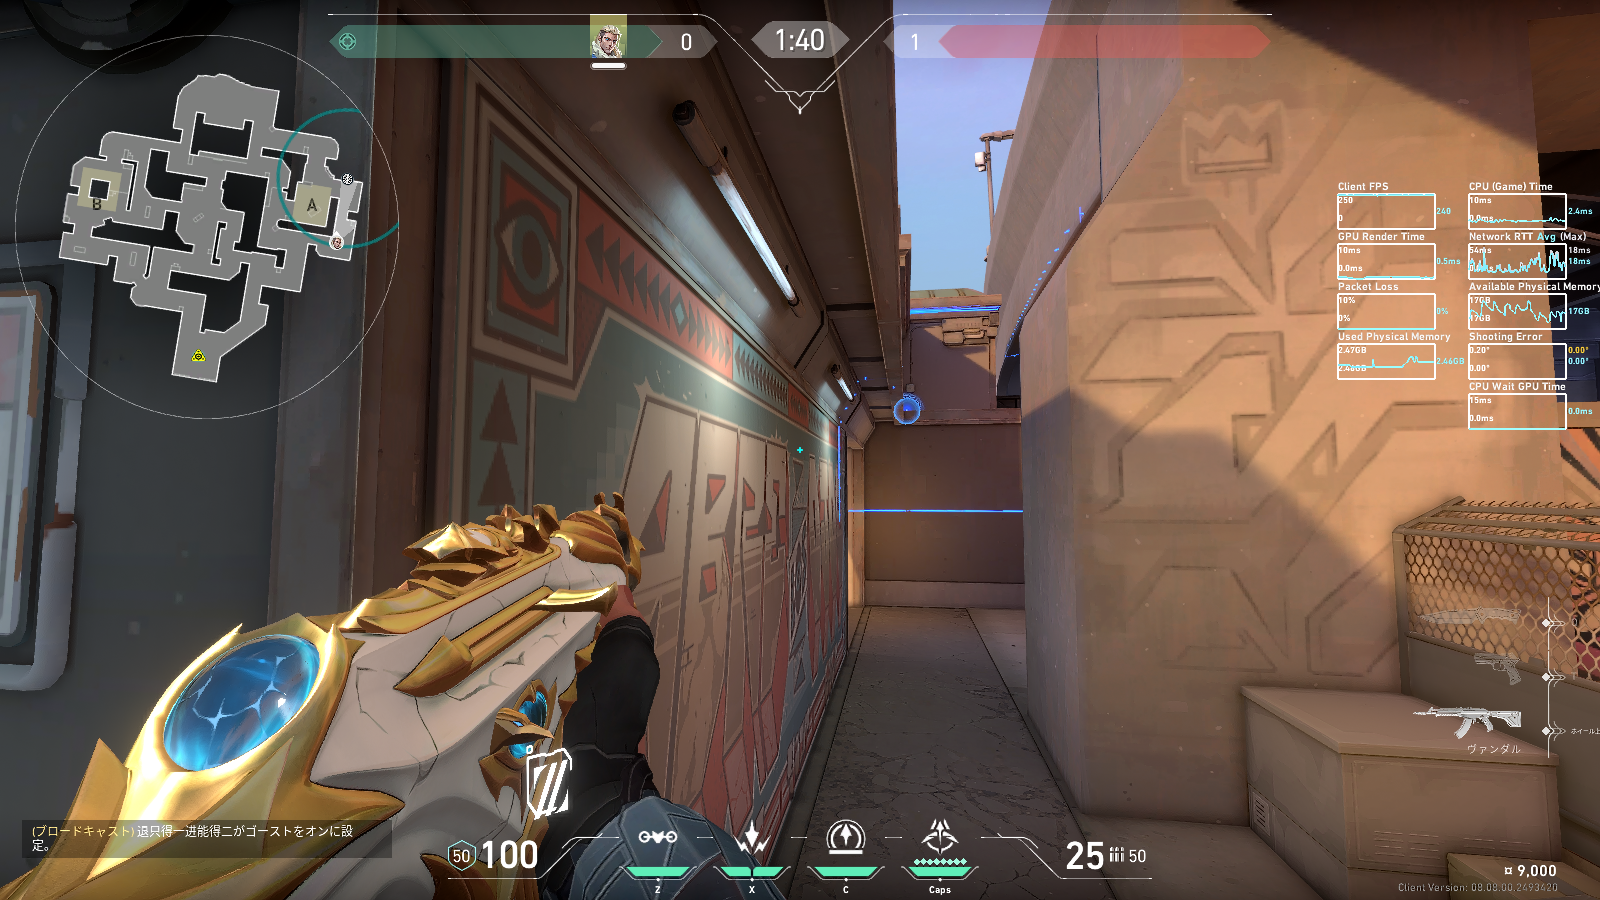 Preview | A攻めのときのエルボーリコン② |
Preview Preview Preview | A攻めのときのエルボーリコン③ |
 Preview 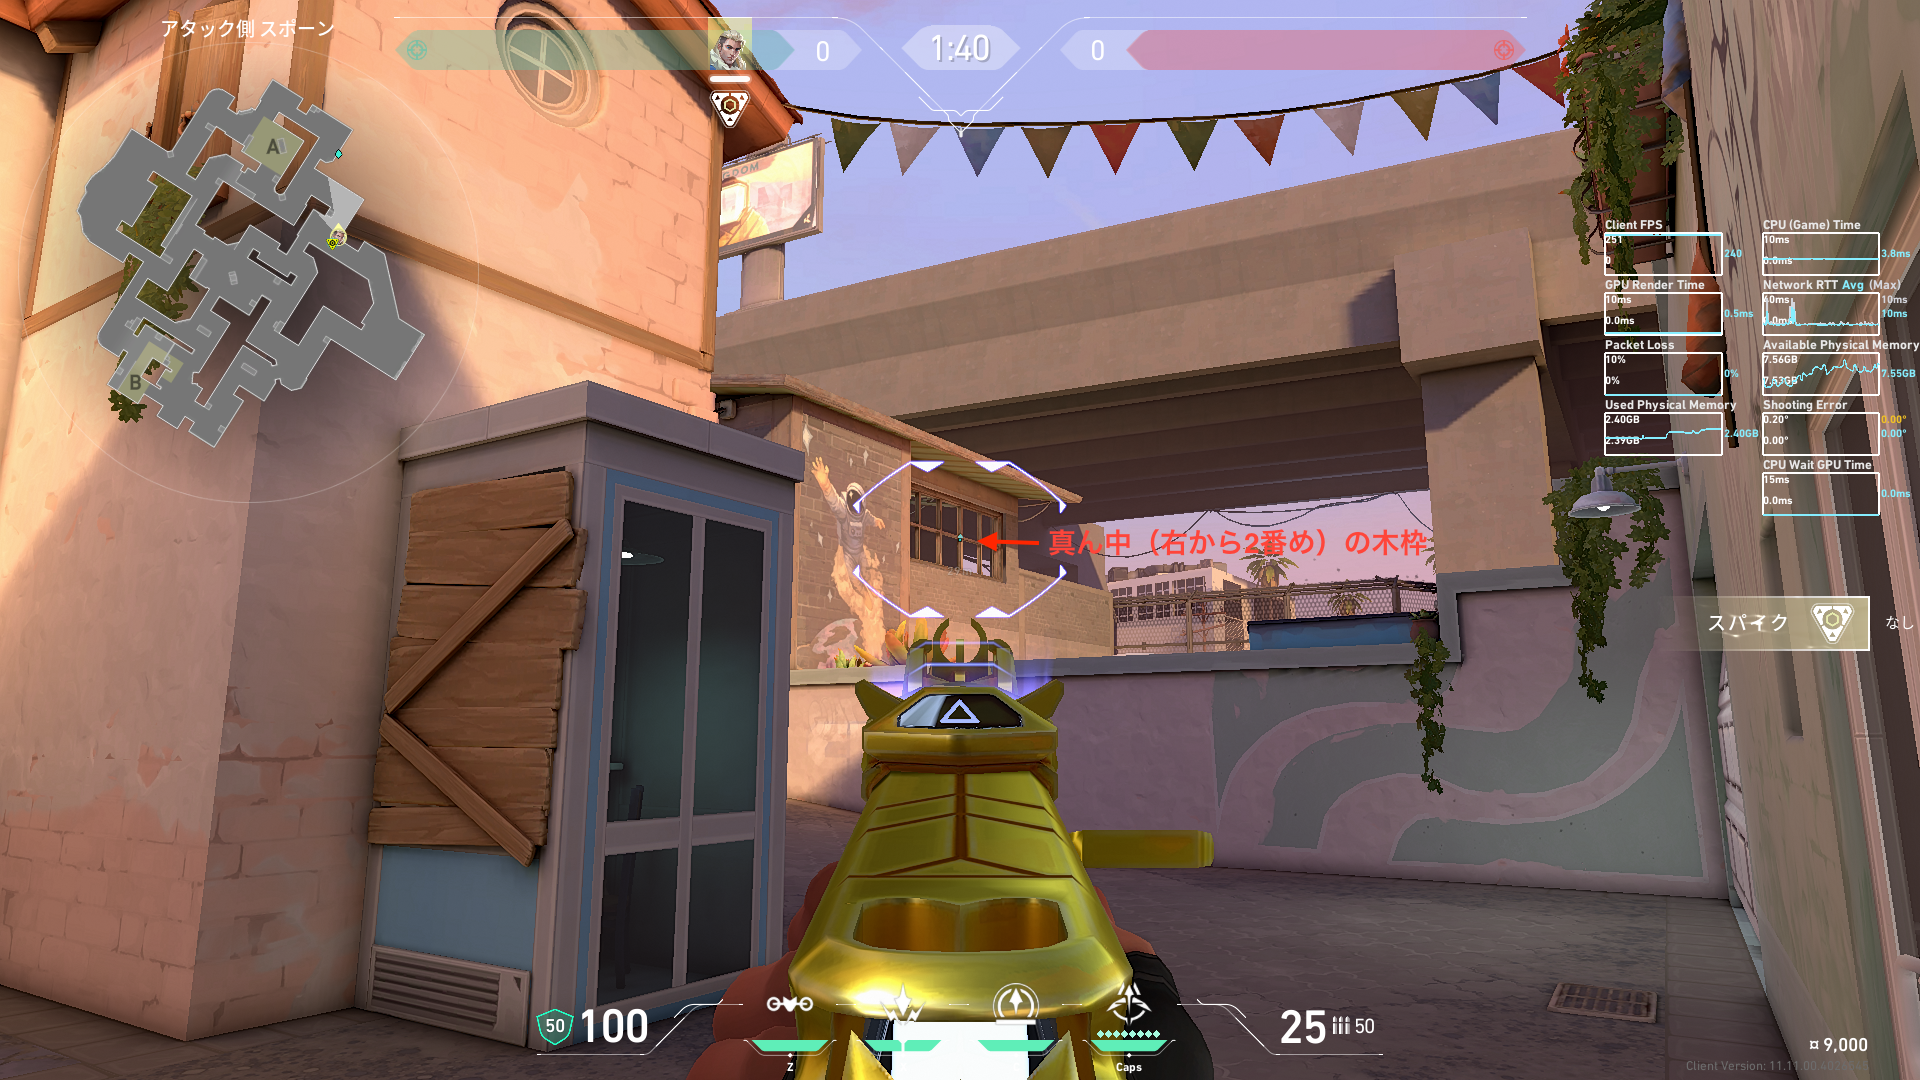 Preview 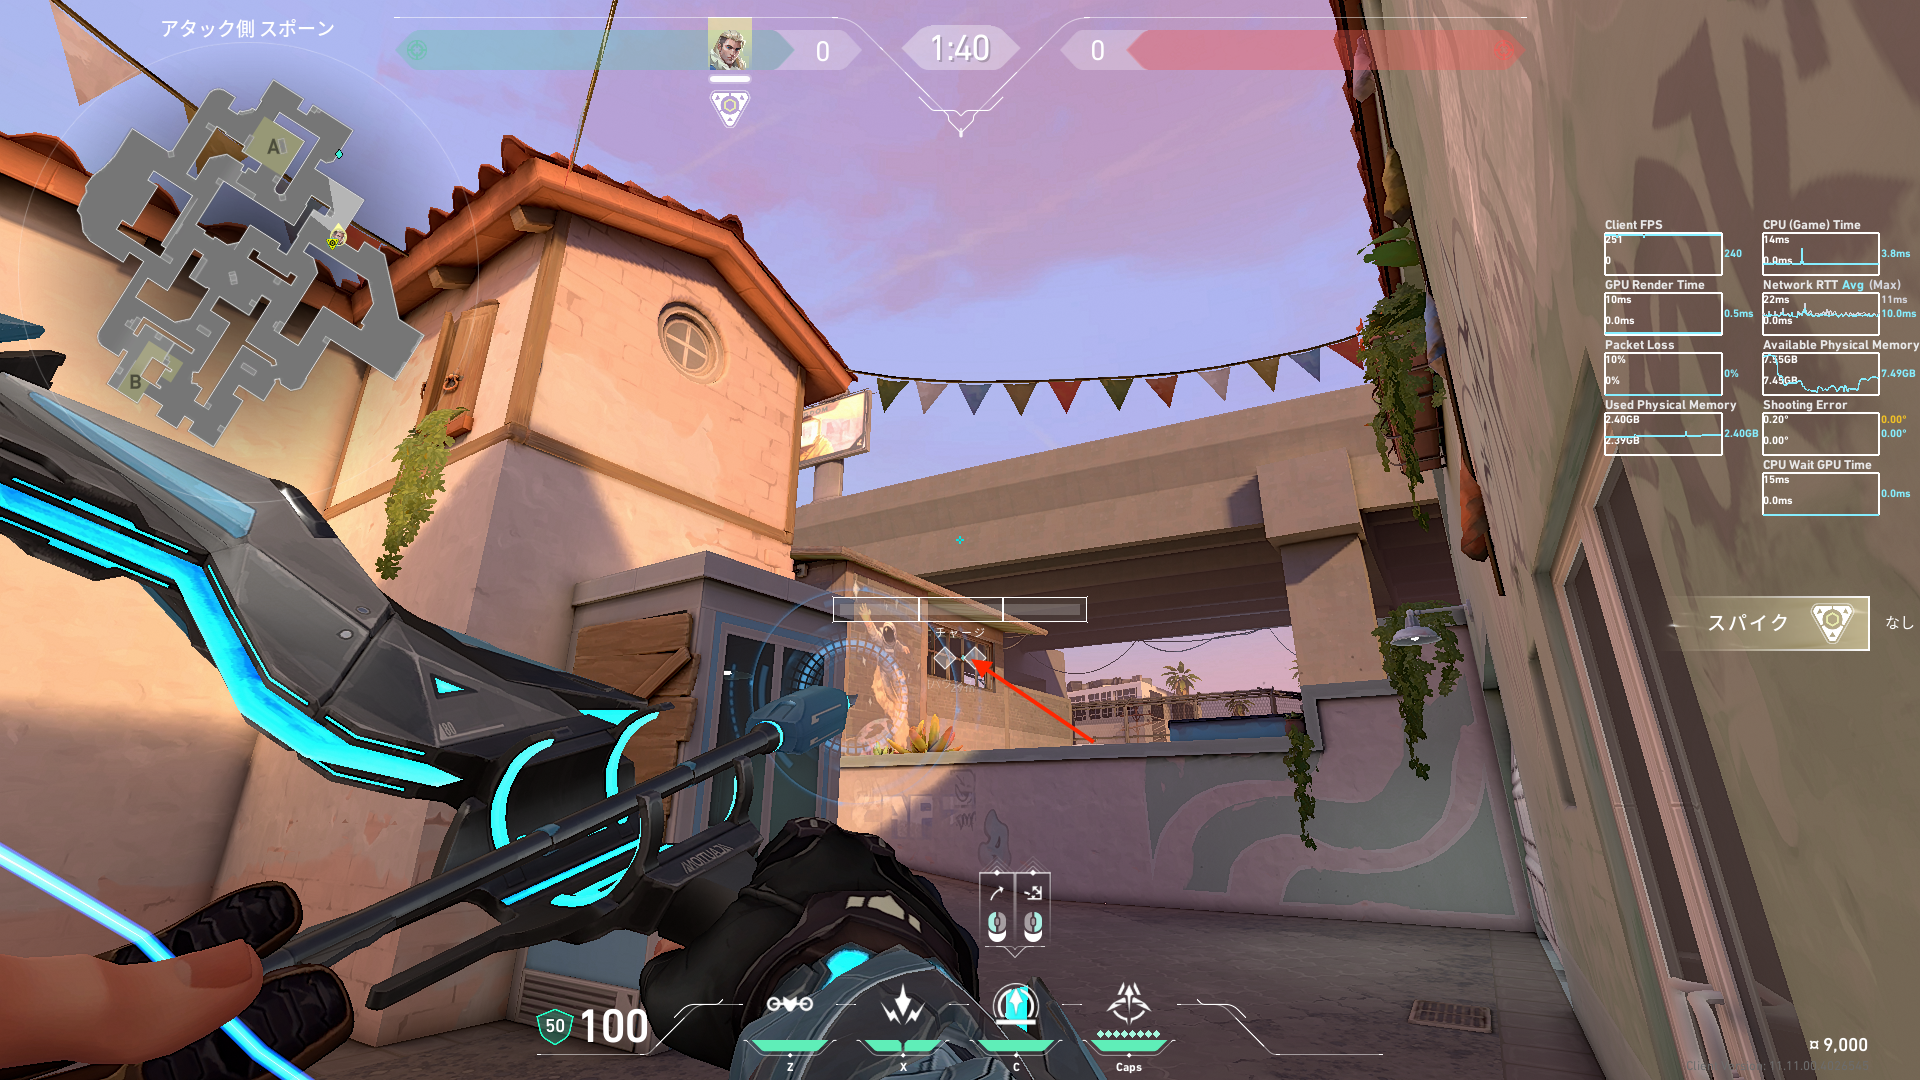 Preview 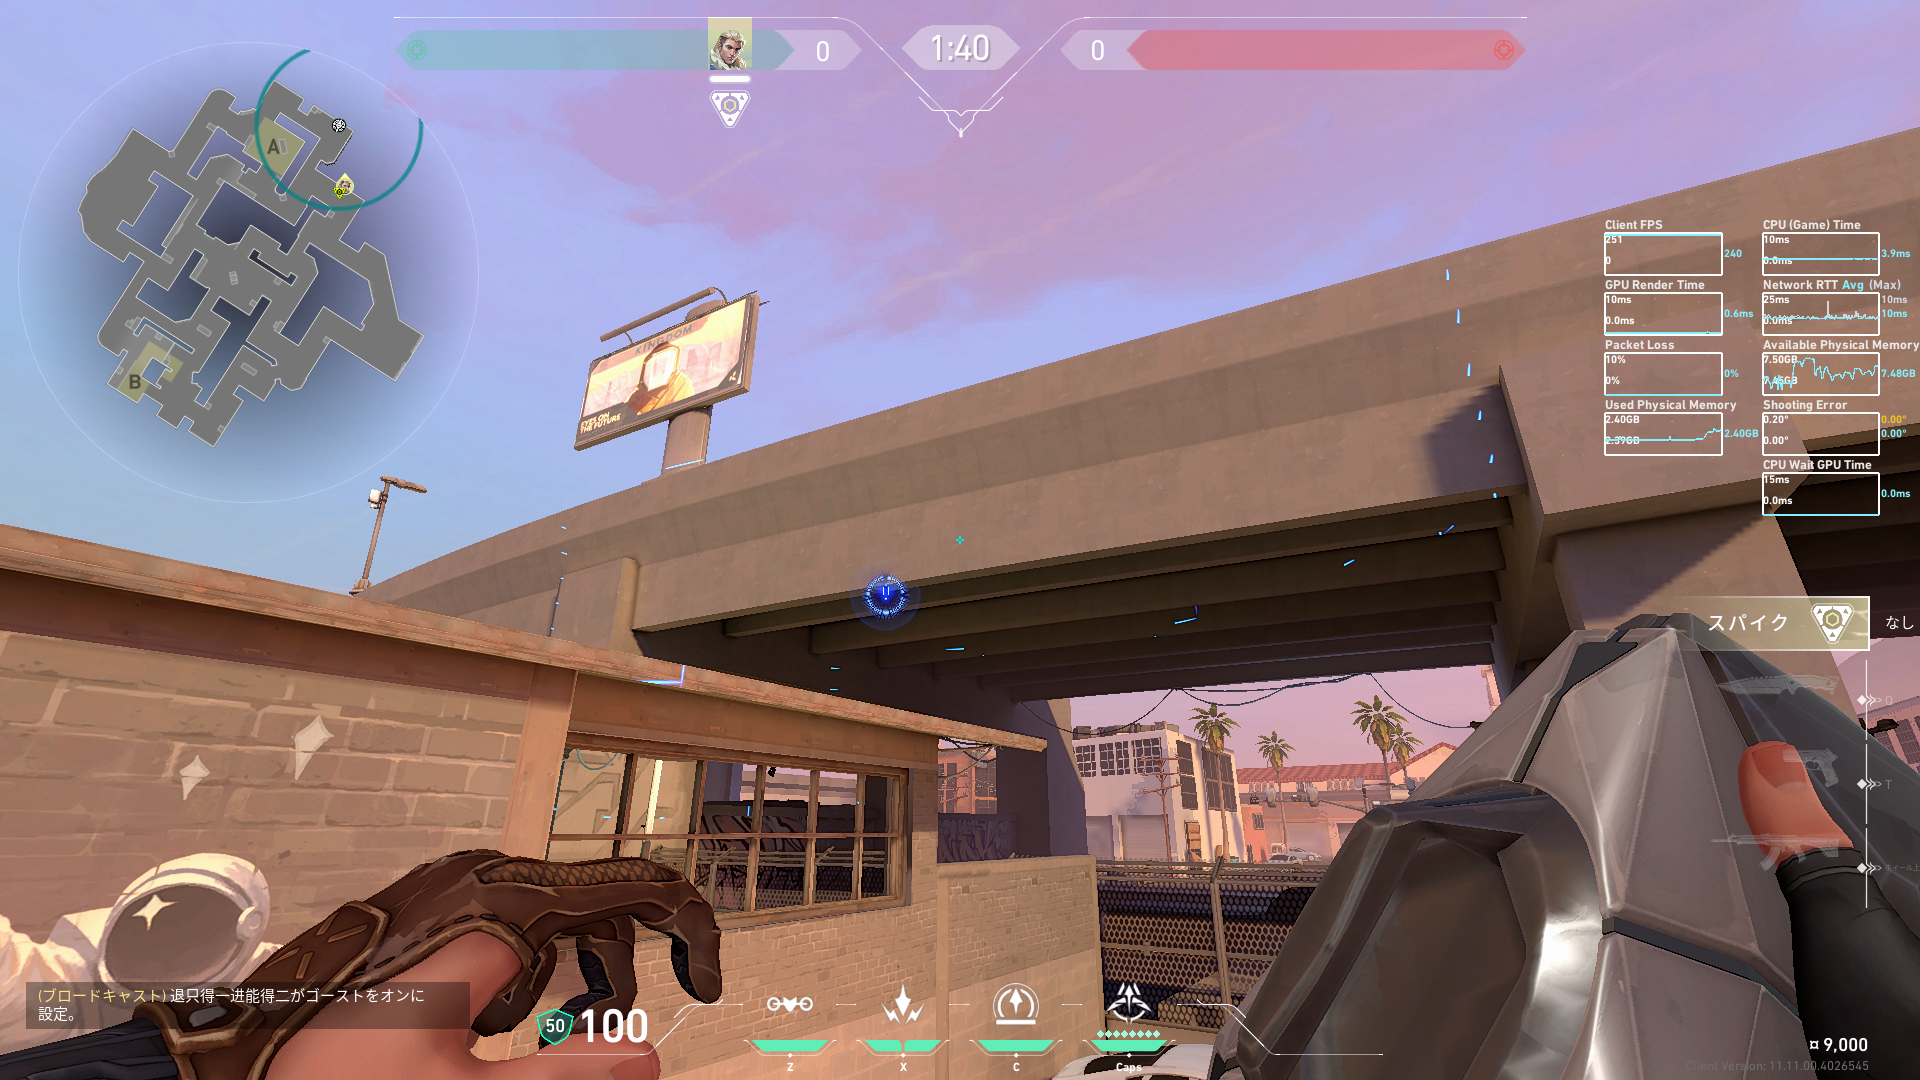 Preview | A守りの開幕リコン |
 Preview  Preview  Preview | ミッド守りのときのAメインへのリコン |
 Preview  Preview  Preview 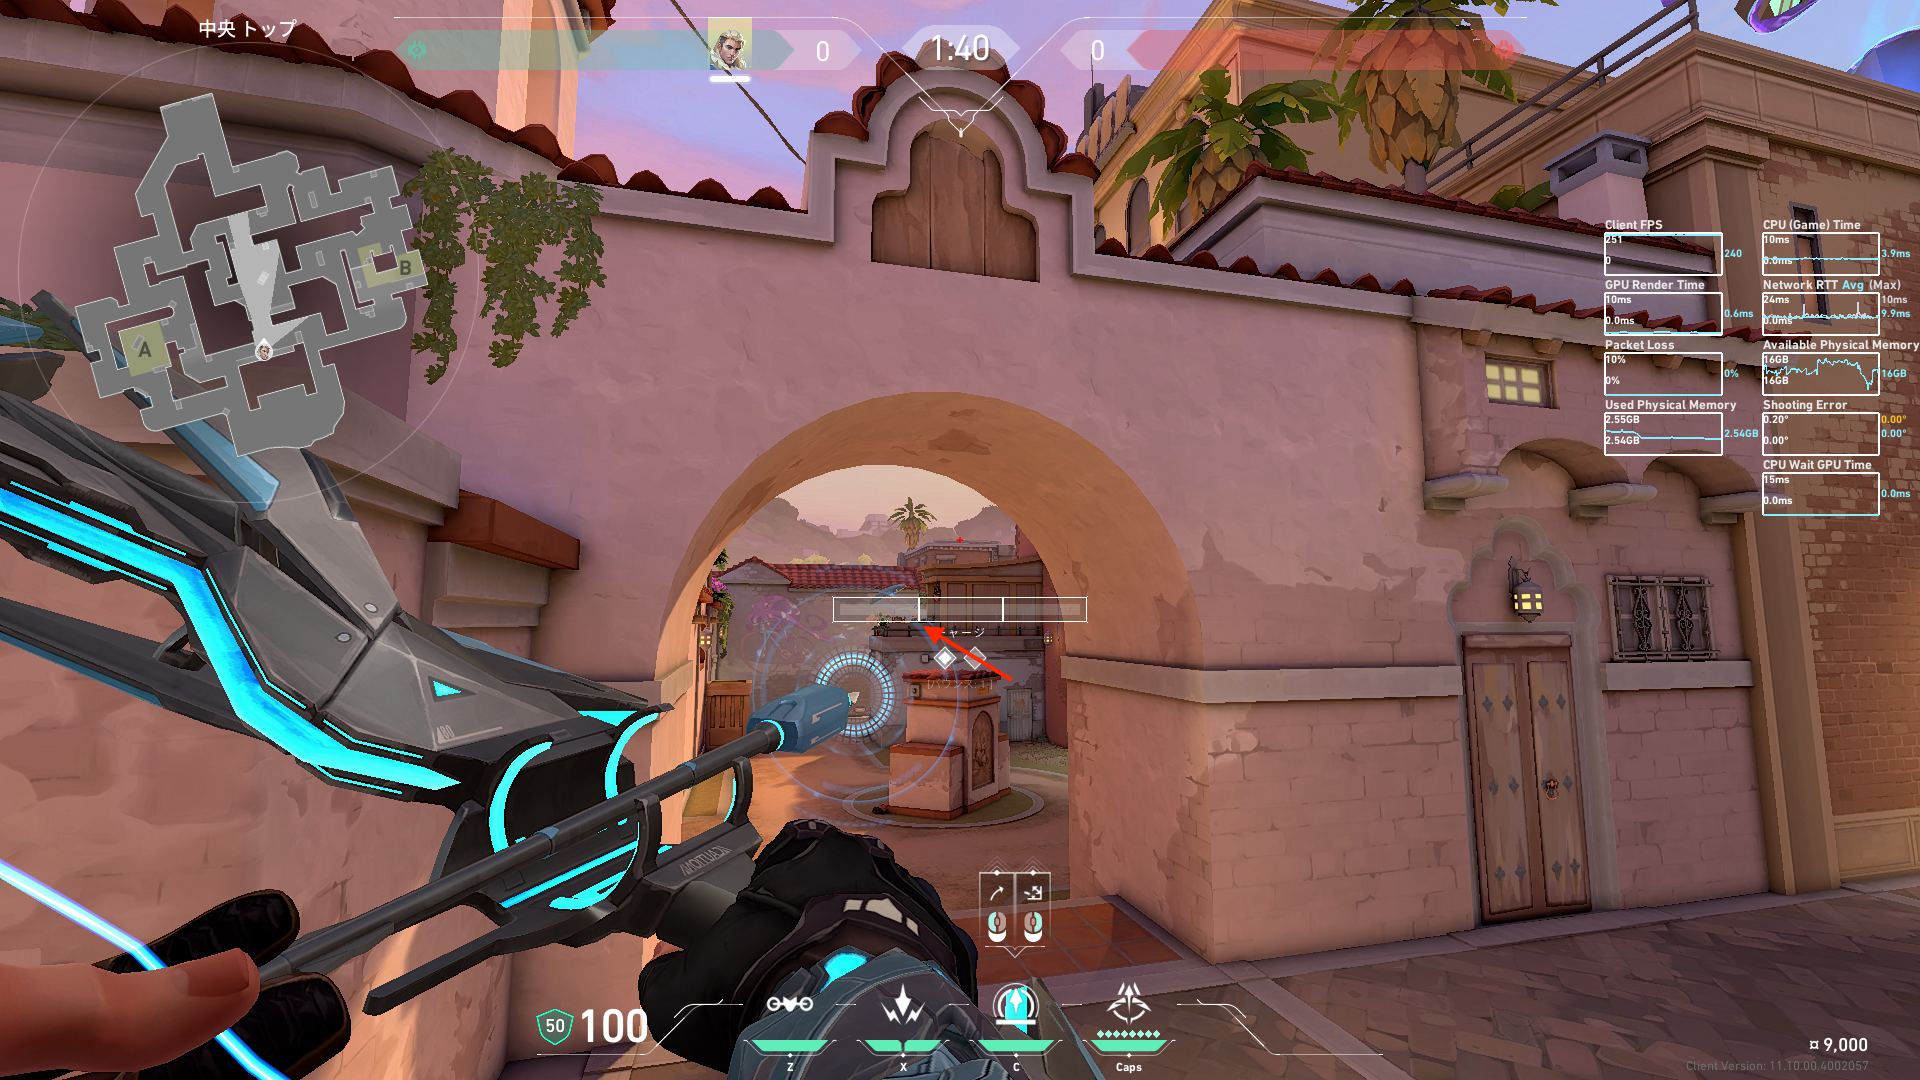 Preview 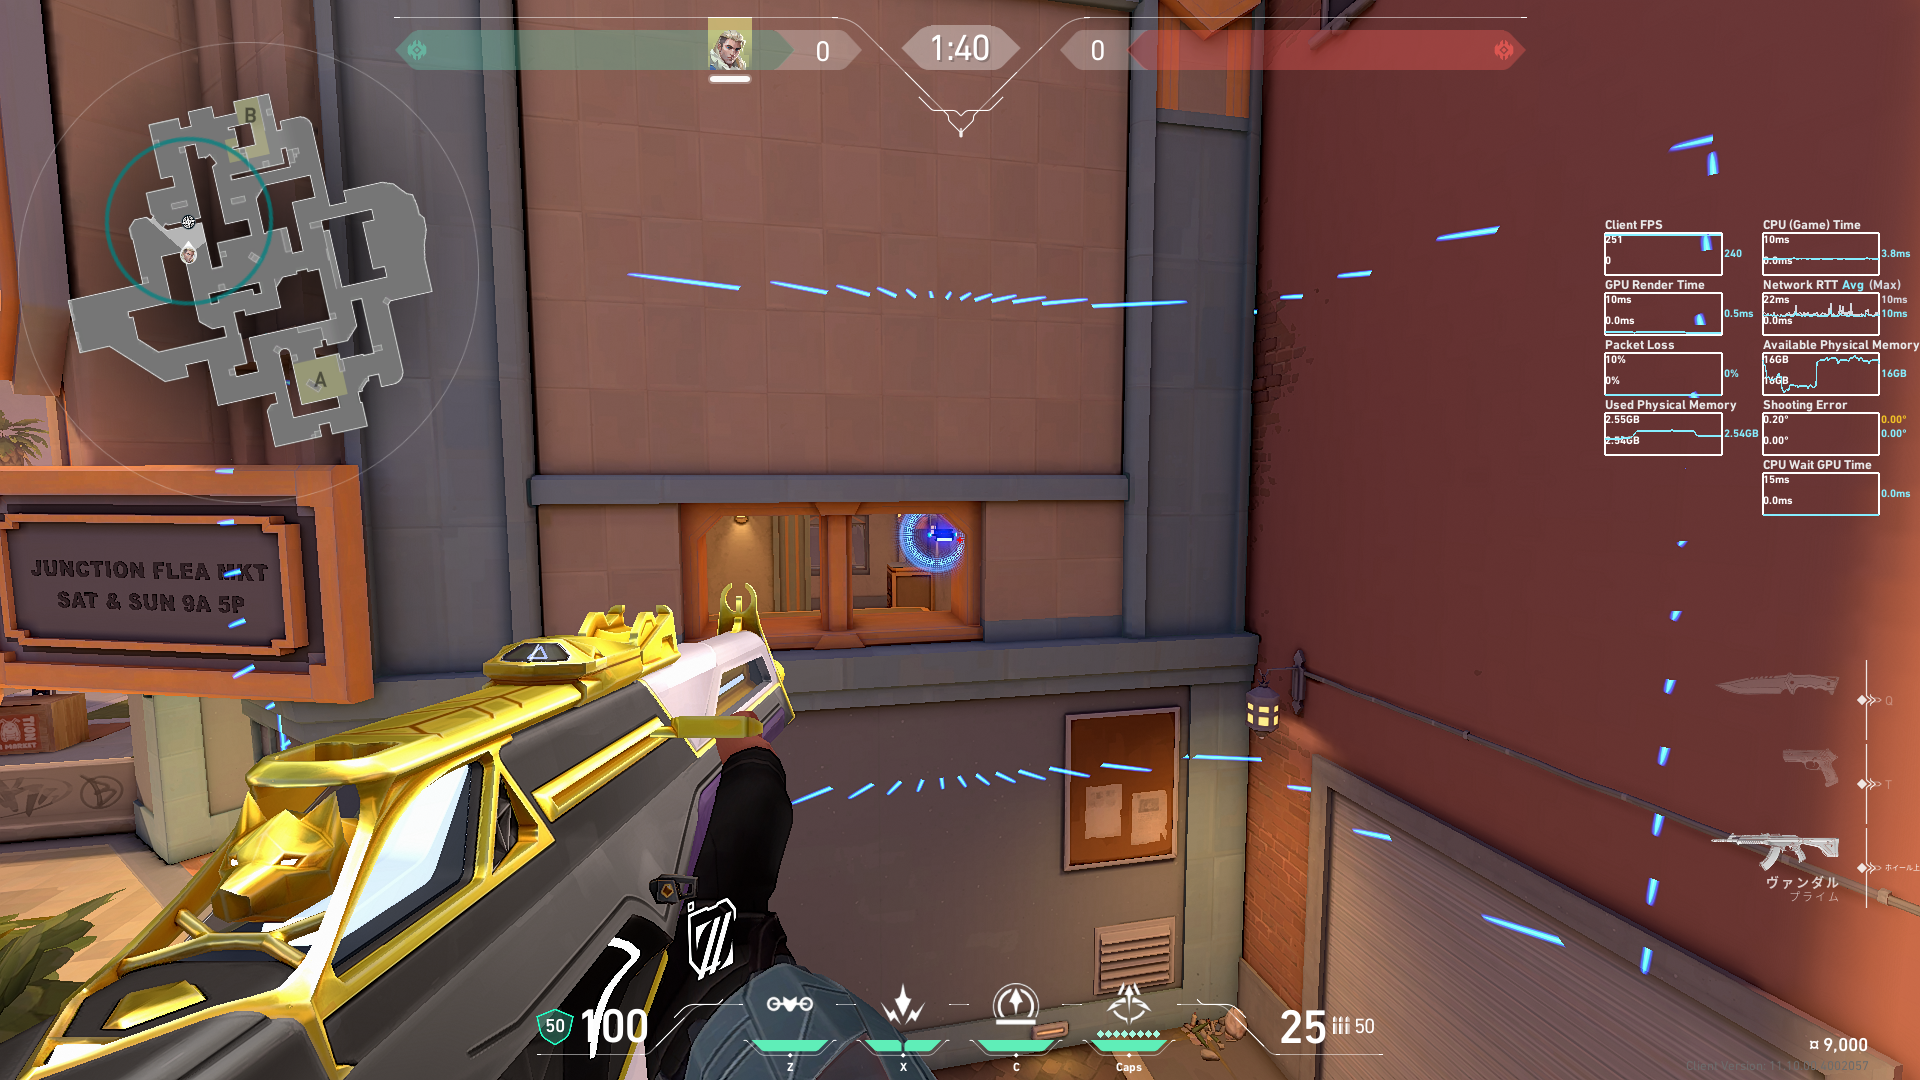 Preview | ミッド守りのときのBメインへのリコン |
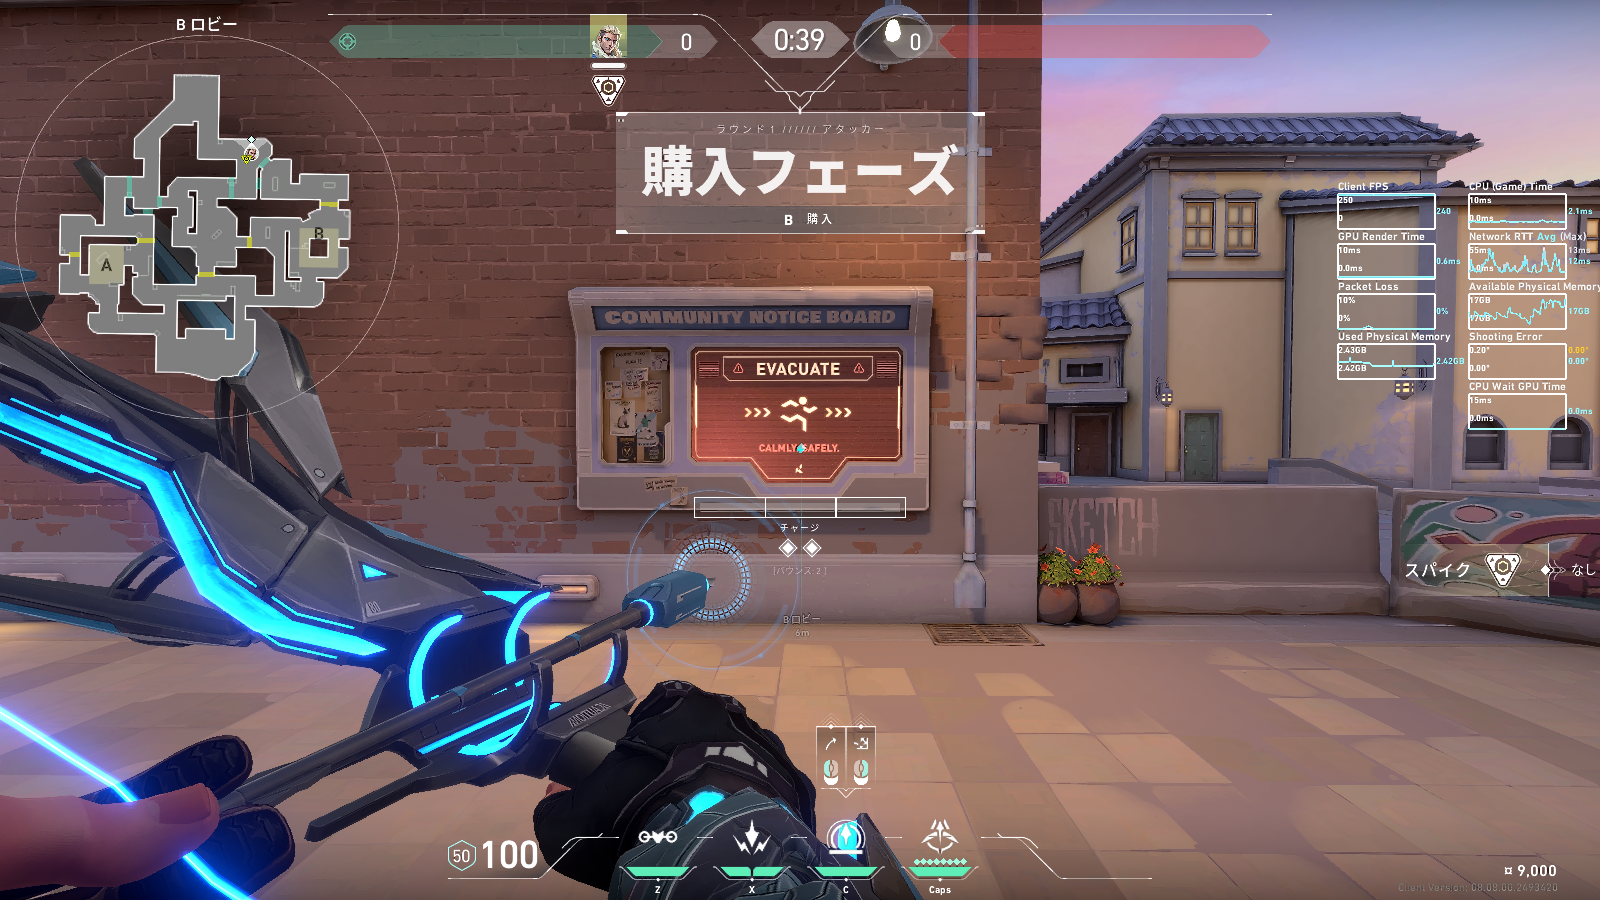
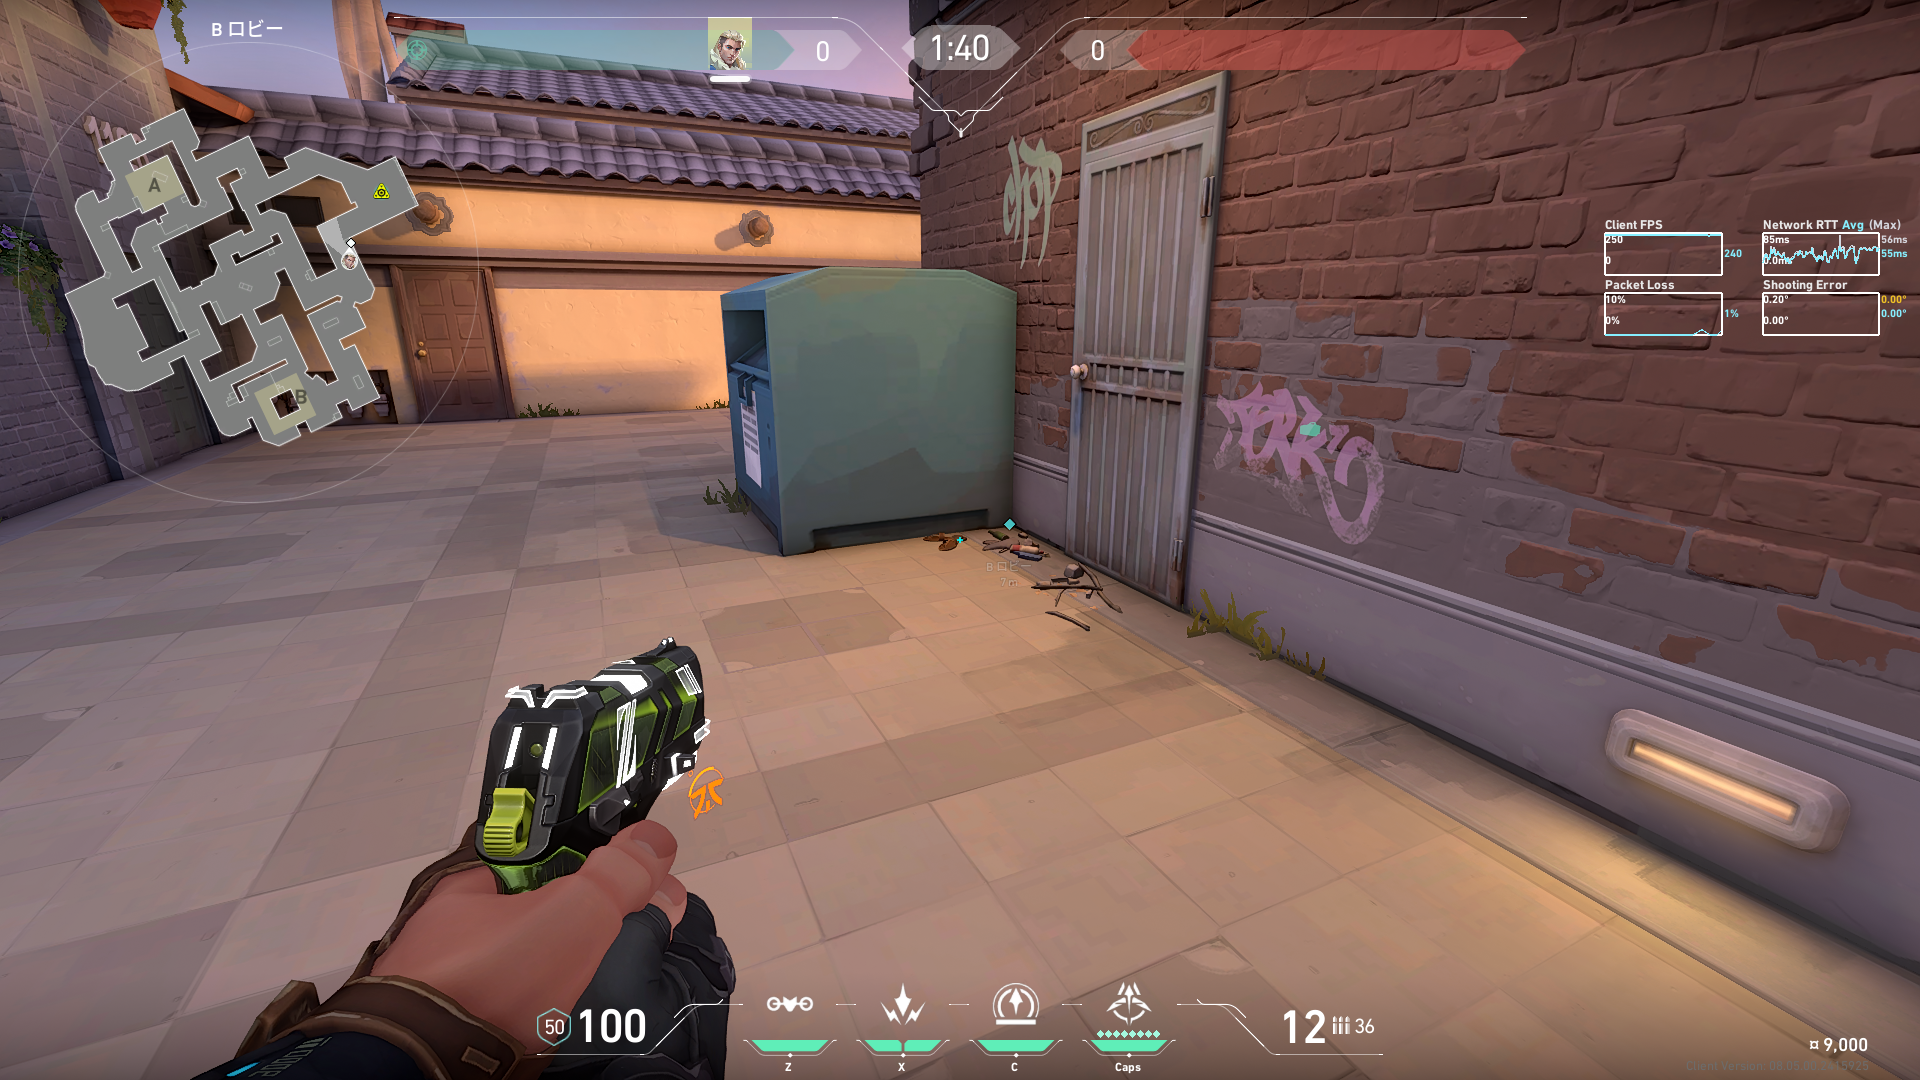
 Preview 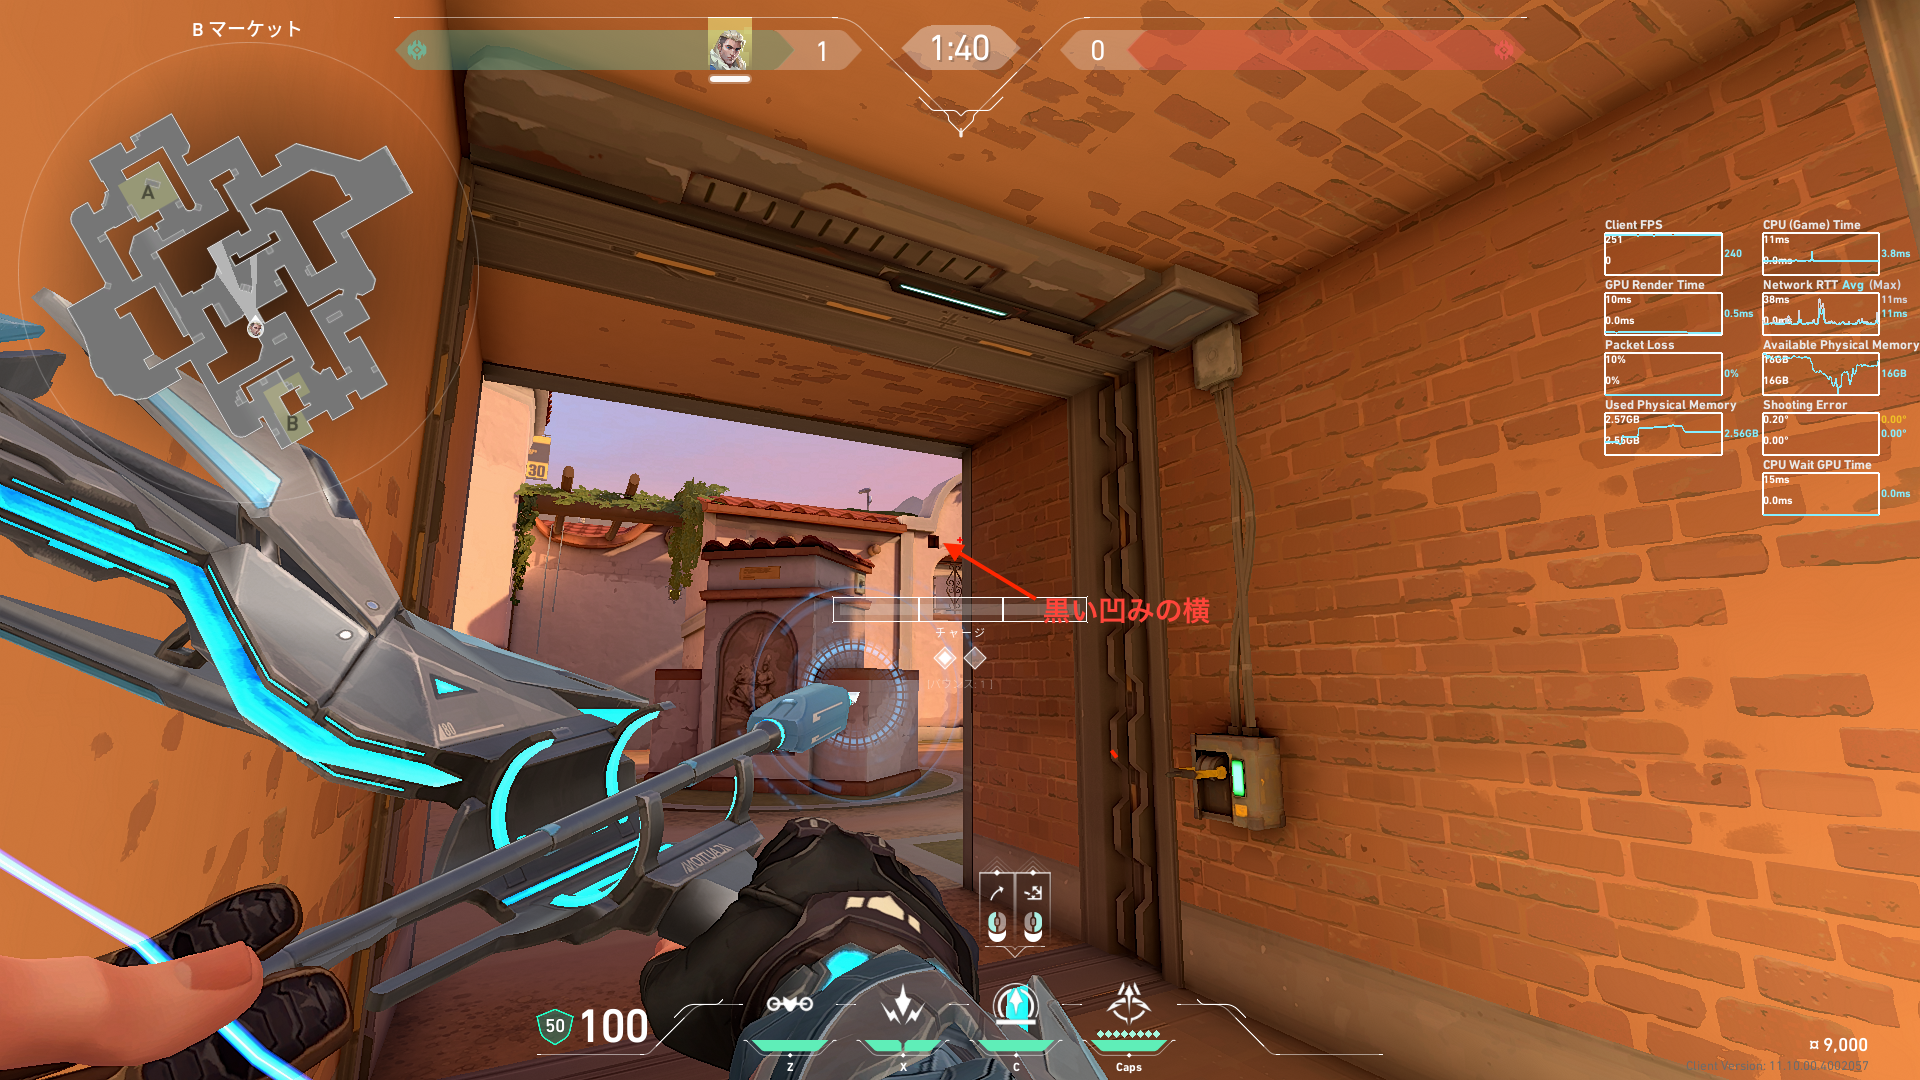 Preview 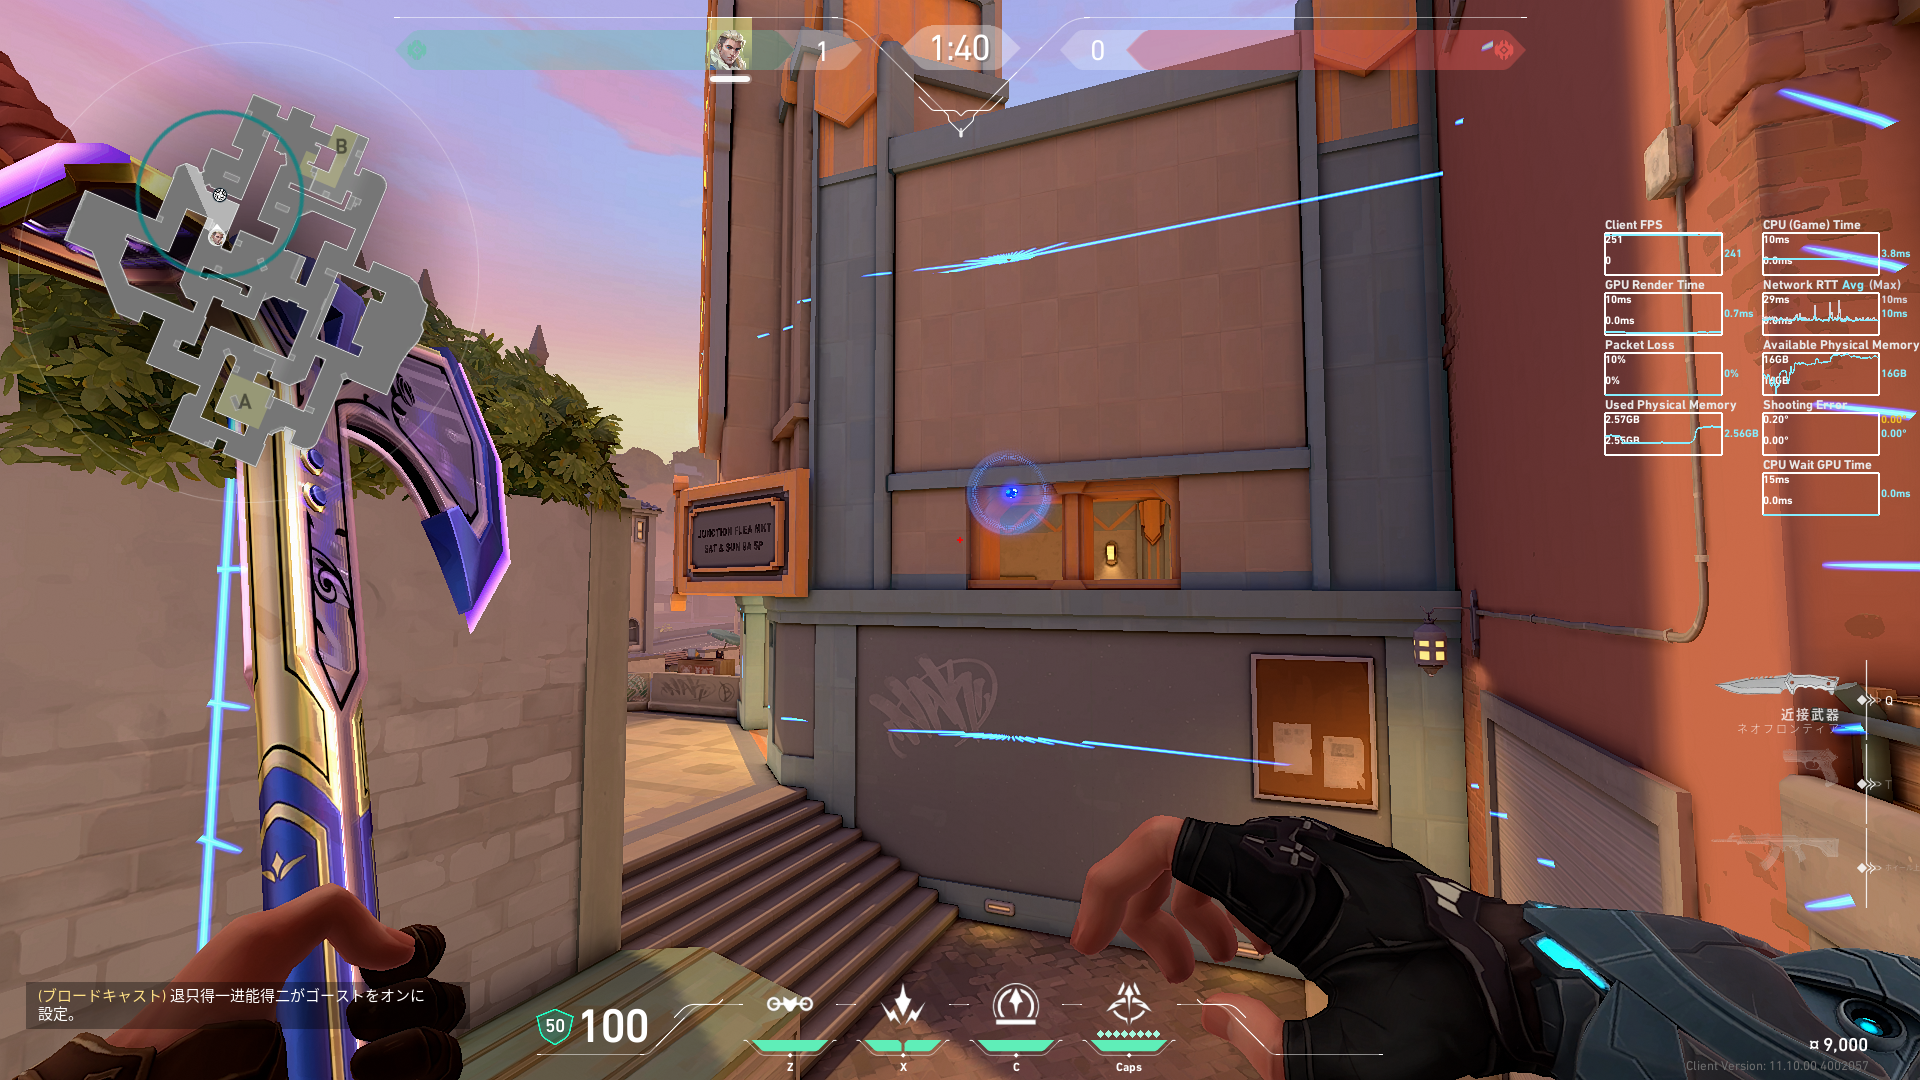 Preview | マーケット守りのときのBメインへのリコン |
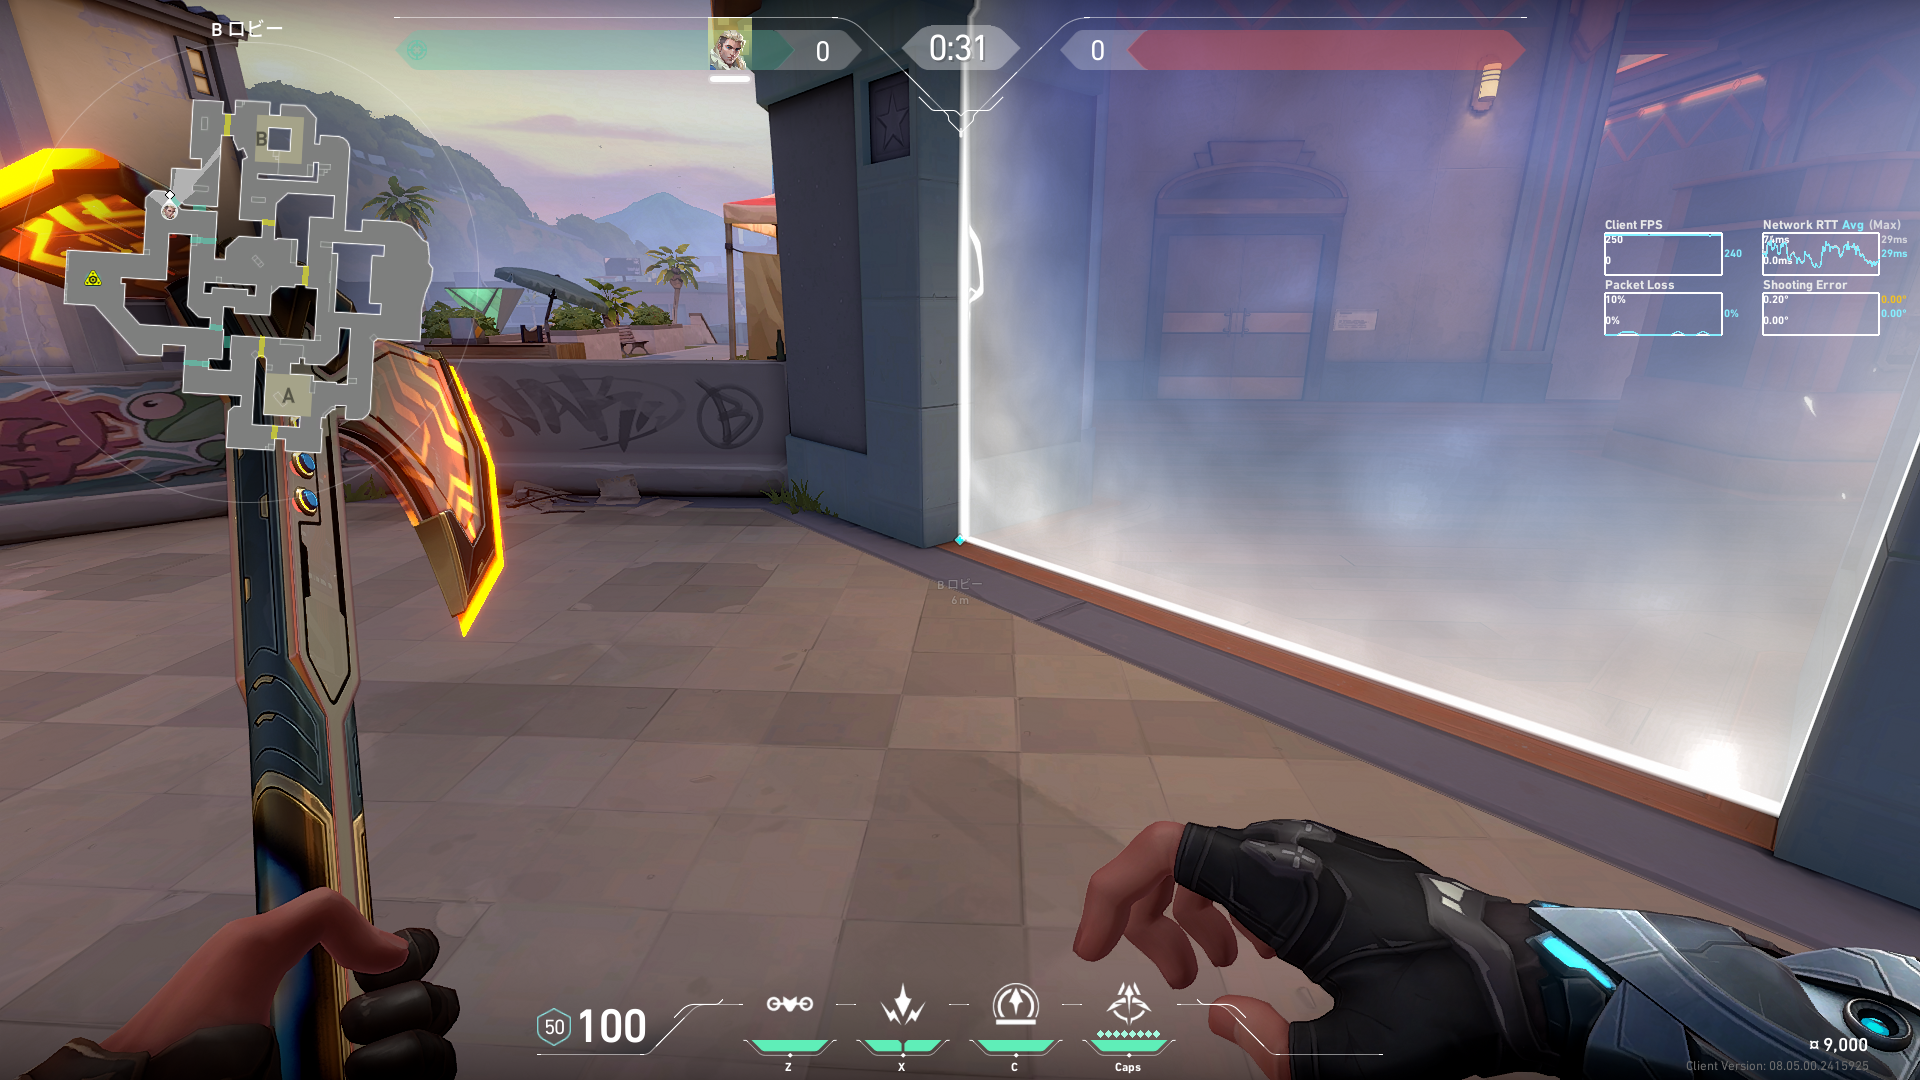
 Preview  Preview | B守りのときのメインへのリコン |
 Preview | Aリテイクのリコン |
 Preview | Bリテイクのリコン |
 Preview | B攻めで射線に余裕があるときのリコン |
 Preview 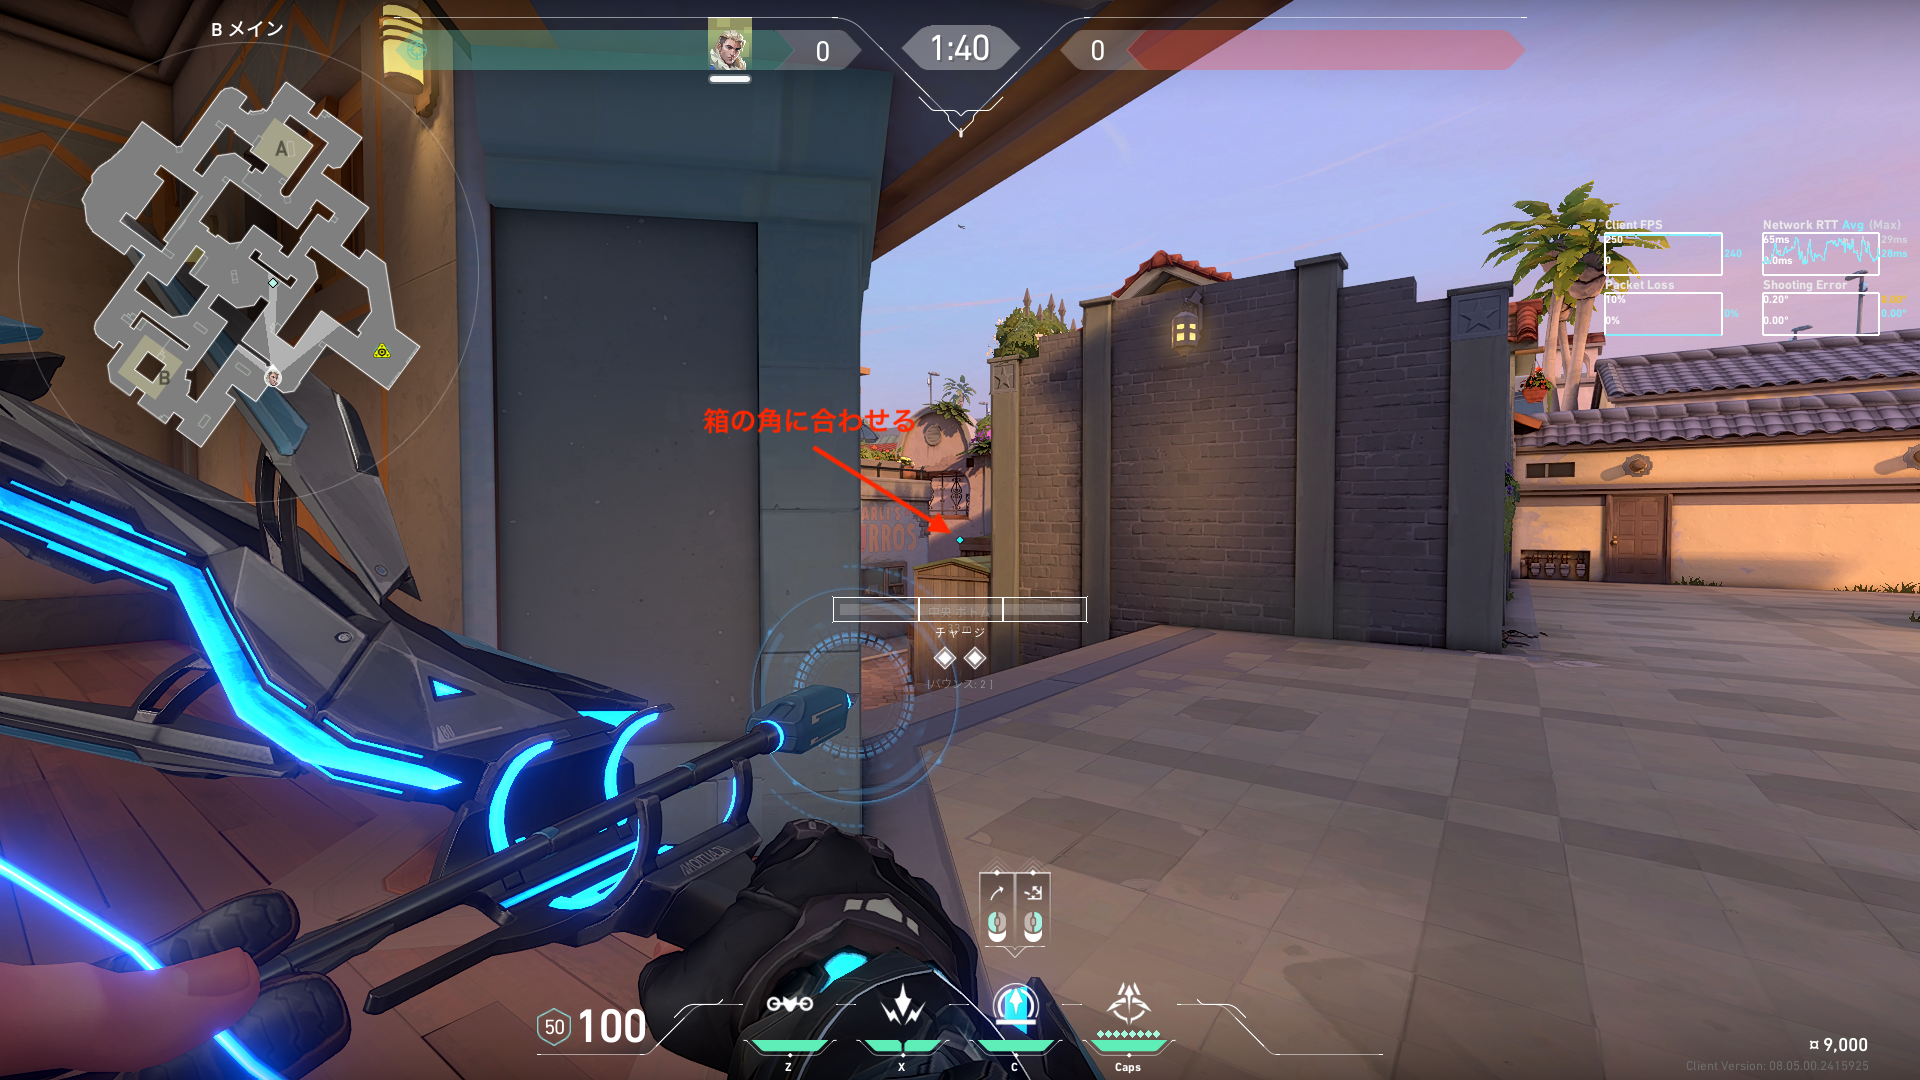 Preview | Bメインからマーケットのワイヤーを壊すショックダーツ |
 Preview 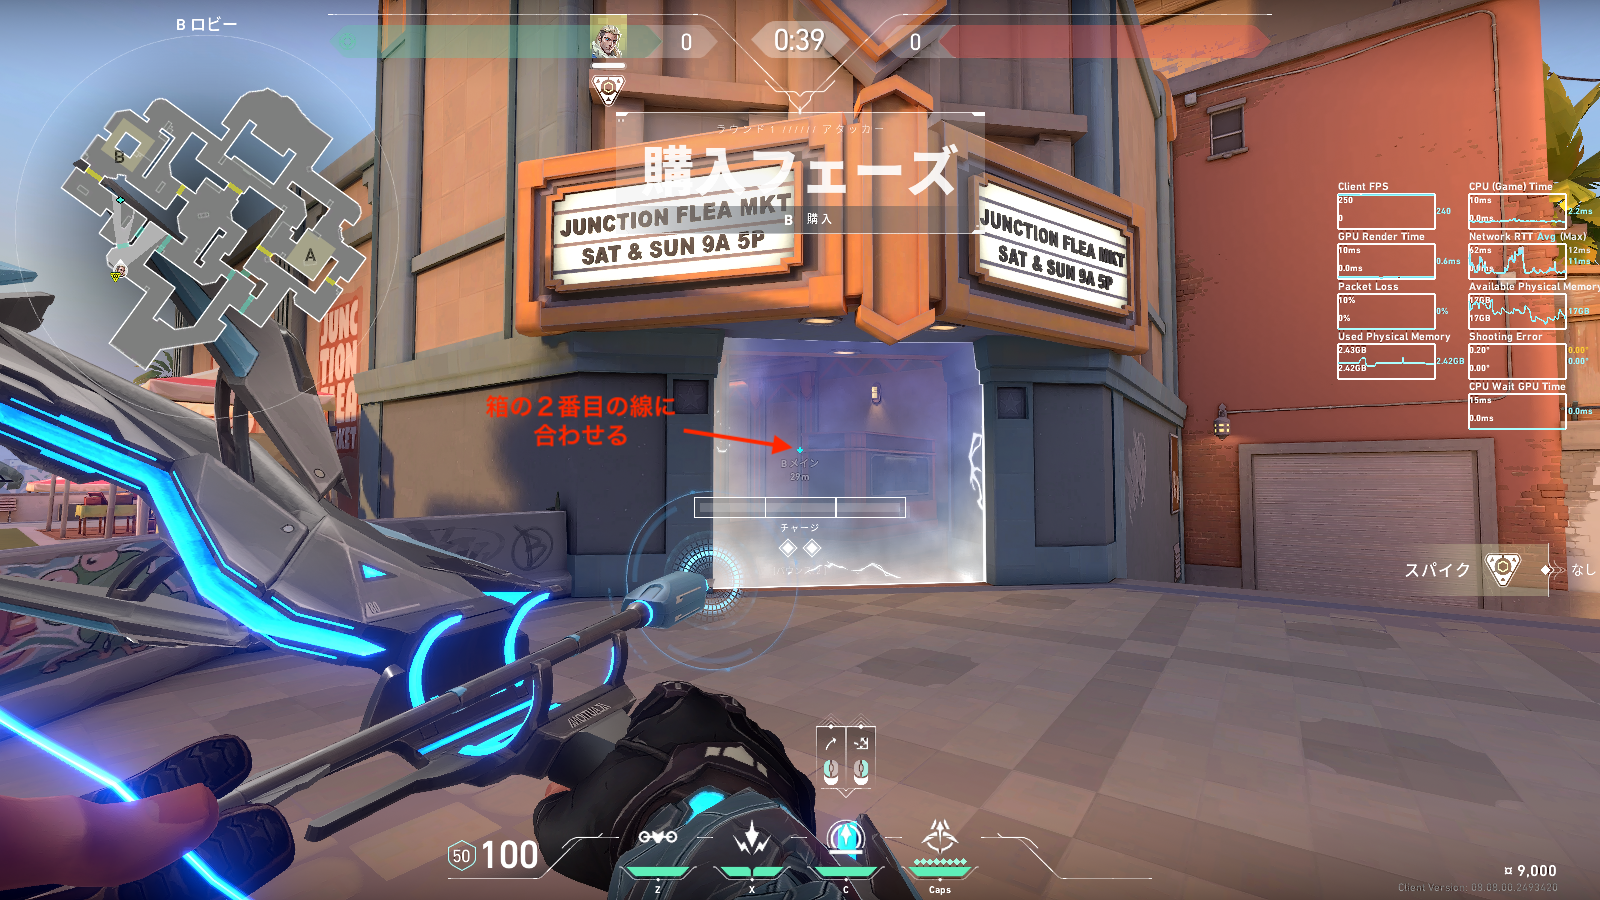 Preview 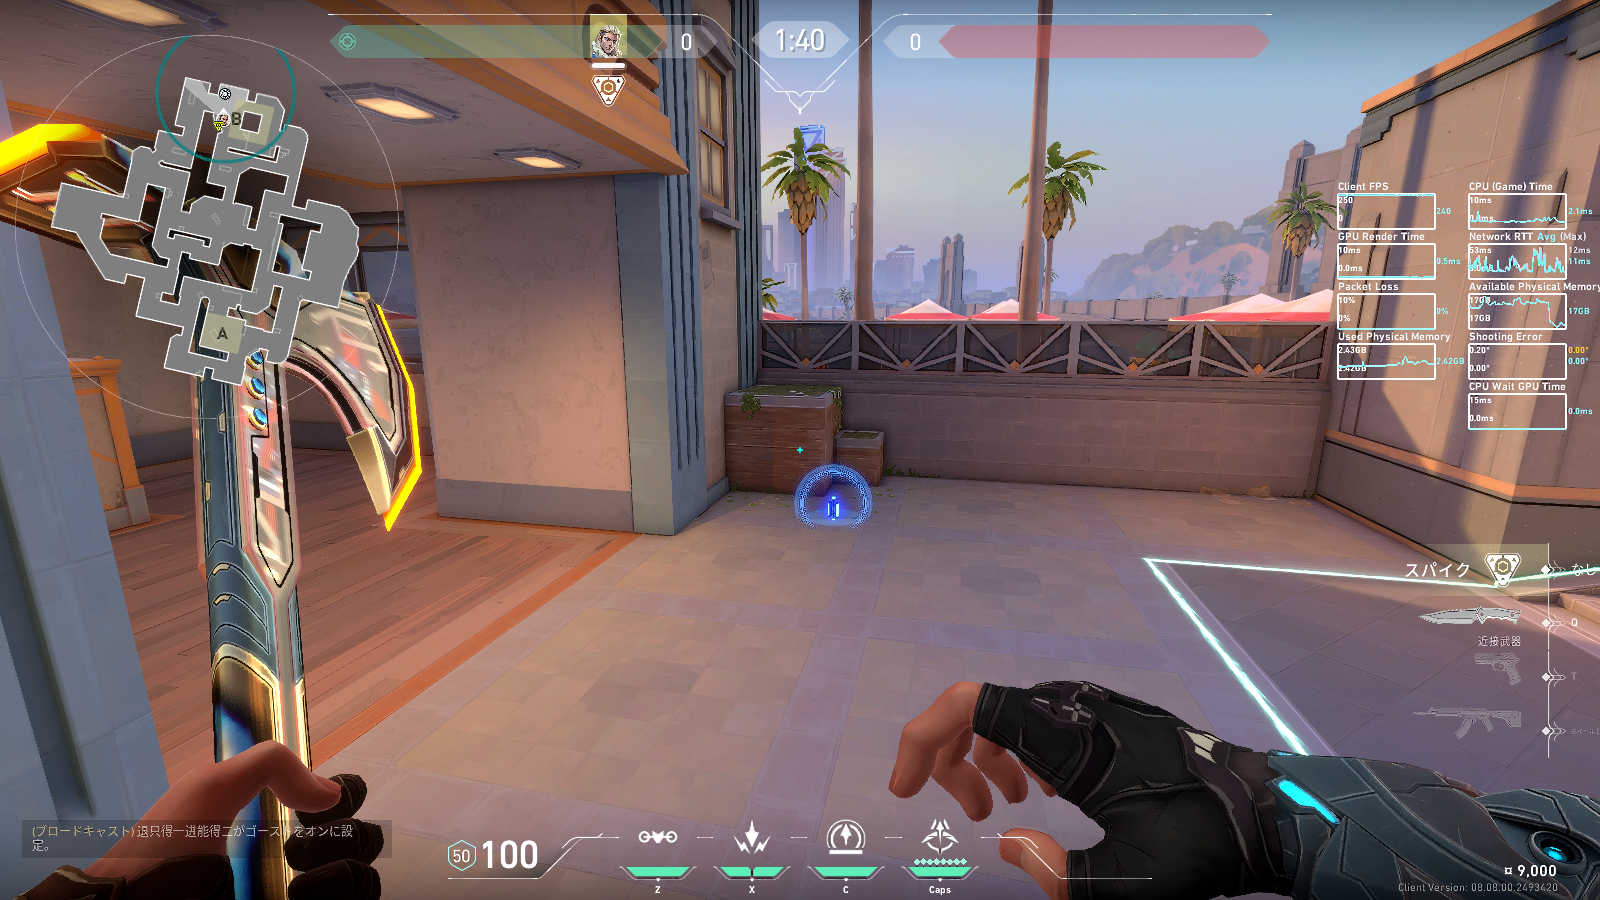 Preview | Bメインからサイト入口のワイヤーを壊すショックダーツ① |
 Preview 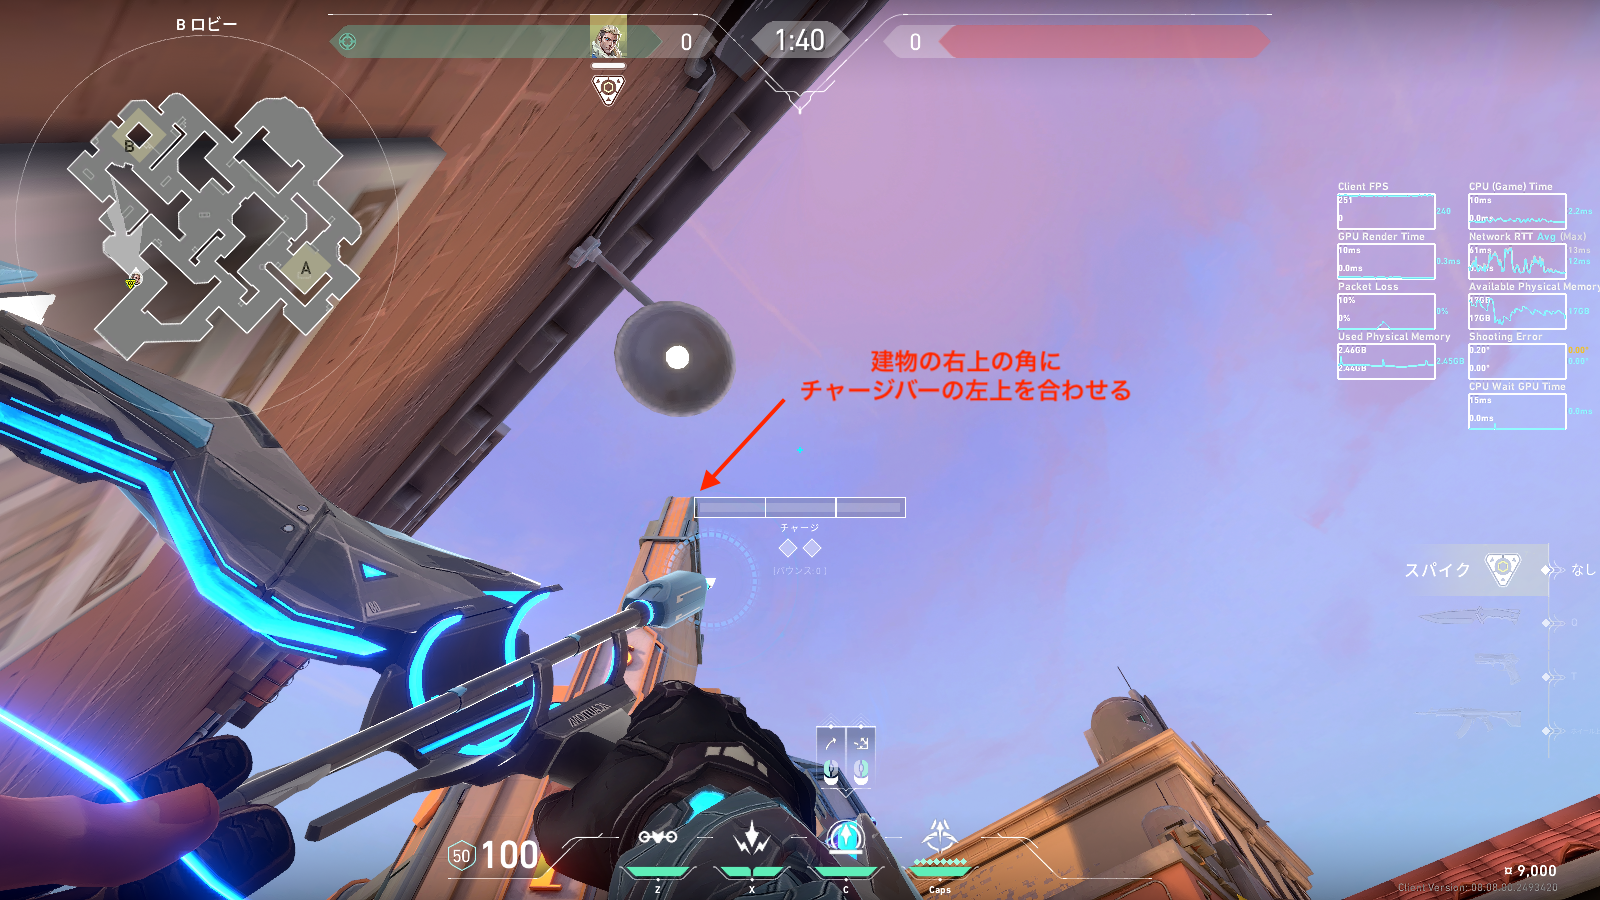 Preview 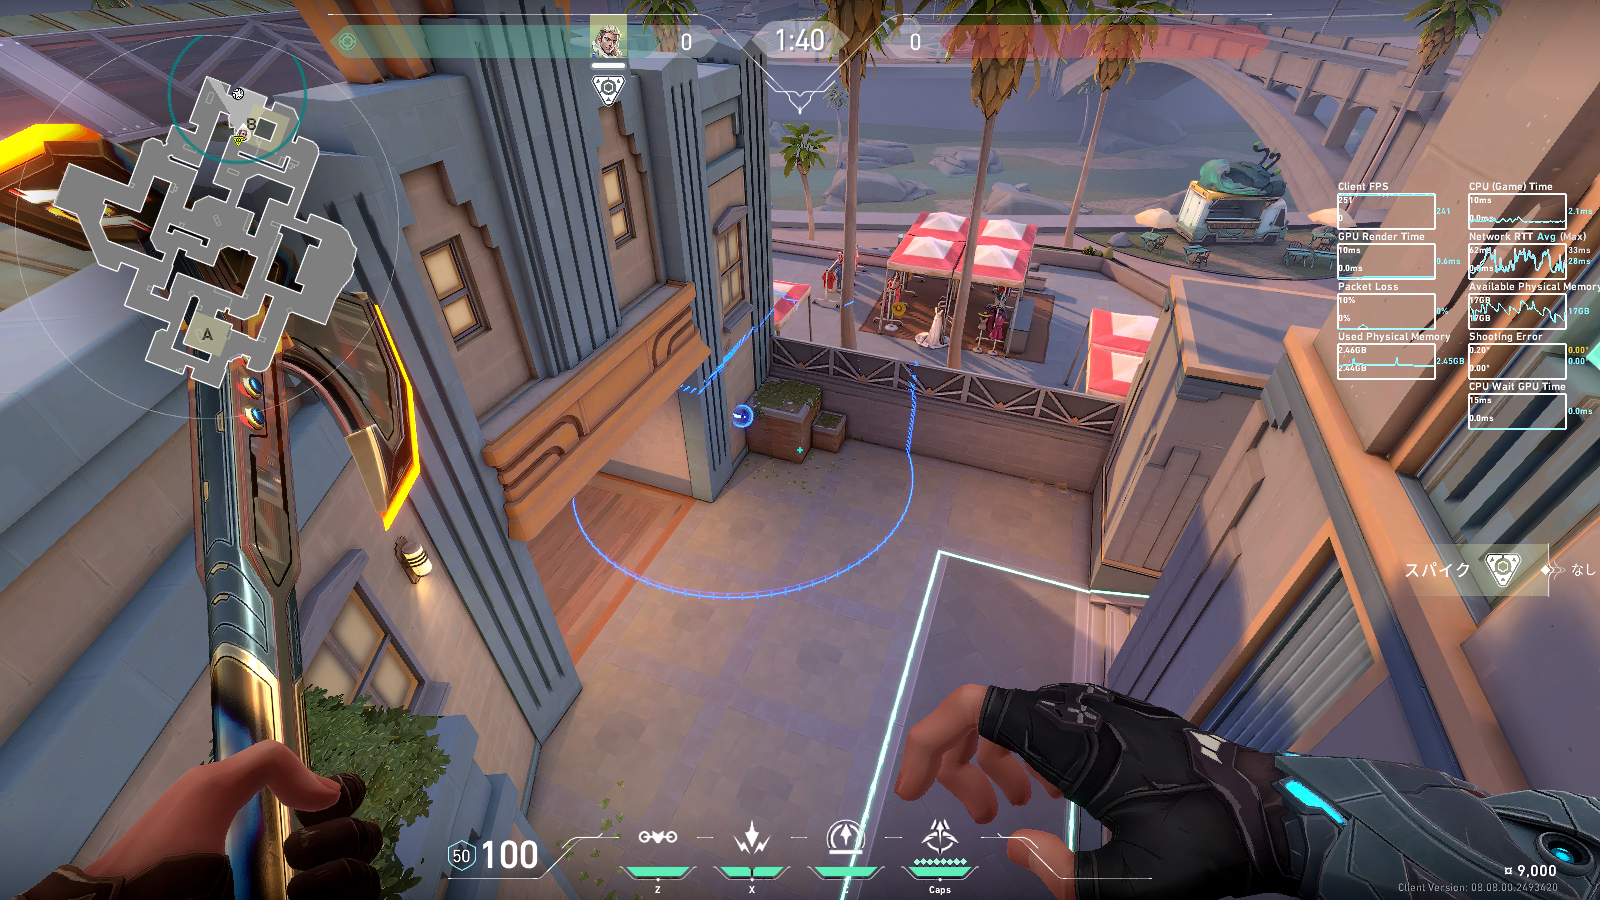 Preview | Bメインからサイト入口のワイヤーを壊すショックダーツ② |